
Another month has flown by! The best change that has happened these past few weeks is with Jude’s sleeping routine. He’s always slept a lot, but now he’s giving us much longer stretches, especially at night. The night before Christmas Eve was the first time he slept 8 hours at night and since then it’s been pretty consistent. He did have a few nights in a row where he started waking up again, but I think his stomach was giving him issues. Once he was able to…let’s just say “clean himself out”… he felt a lot better and started sleeping again. Last Saturday night he even slept 9 hours for us! I feel like such a different person now that he’s sleeping better at night. Being able to count on a full night’s sleep again makes such a difference. I have way more energy to play with Emery, which makes Emery happier, and that in turn makes me happier. So Jude sleeping through the night is benefiting everyone!
He’s continued to be a great eater and nursing is going very well for us. We occasionally supplement him with an extra ounce of formula before we put him down for the night. I think that has helped him stay fuller throughout the night and therefore sleep longer. He’s a big boy too so I feel like he needs the extra calories and I know my milk isn’t very fattening (which is one of the reasons Emery was so skinny as a baby). Jude never says no to more food—the kid could eat all day long and be happy.
He has also started becoming more interactive, which is a lot of fun. Grant is the best at getting him to smile. He does it for me every once in a while, but Grant definitely gets smiles and “coos” out of him the most. He’ll even smile for Emery! We’ll involve her by saying, “Emery, come make Jude smile!” and she’ll come over and say “Hiiiiii Jude!” and shake rattles in front of his face and try to get him to look at her. It’s so cute! She has a short attention span so it usually only lasts a few minutes before she’s moving on to the next thing.
I’m really excited for these next few months. In my opinion, it only gets better as he gets older and becomes more fun to play with. I’m especially excited for Emery to be able to play with him. I know she’ll love having a permanent playmate. And I will too! Right now Emery is at the age where she needs my attention 24/7 and it’s pretty exhausting. Not that I don’t love playing with her, but some times I just need a break! So it’ll be nice when the kids are old enough that they can hopefully play together and entertain themselves.
Jude’s really such a good baby. We feel very, very lucky! He pretty much sleeps all day and when he is awake, he’s usually happy just lying down, looking around, and sucking on his hands. Grant thinks he is starting to look a lot less like Emery and some days I agree, but for the most part I still think they look so much alike. Here’s a comparison shot of Jude and Emery, both at two months old:

And then one more shot of just Jude, from our photo shoot earlier:


Well Jude is already a month old! How did that happen? I really feel like I was just at the hospital having him, but I guess that’s how time goes. Especially when you have a newborn–something about the lack of sleep really warps time for you! Things have been great so far though. I think a big part of that is because my saint of a mother was here with us until last week! She was such a huge help, I can’t thank her enough. When you have a newborn, the absolute last thing you want to think about is cleaning your house or making dinner or really anything besides brainstorming how to get more sleep. So having her here watching Emery for us, cleaning, cooking our meals, grocery shopping, and everything else she did was really so amazing. And let’s just say we have seriously missed her since she left! I’m pretty sure Emery was under the impression she had moved in with us permanently, so I think her leaving was hardest on Emery.
Back to Jude: he is definitely not starving! Baby boy is already almost 11 pounds which kind of blows my mind since I’m pretty sure Emery wasn’t 11 pounds until around 4 months old. He’s also sleeping better for us at night. It took a while but he’s now giving us a 4-5 hour stretch each night, which doesn’t sound like much but I’ll take it! Waking up only once while it’s dark out is infinitely better than waking up 2-3 times. The time doesn’t seem to affect me as much as the position of the sun. Seriously, if it’s already light out when he wakes then I don’t feel nearly as tired. But if it’s dark it’s an entirely different story.
Jude’s also getting much better at being happy while he’s awake. For the first few weeks we were kind of concerned because he was either asleep or he was fussy. Grant was convinced he had stomach issues or something seriously wrong. Turns out he is just a baby and that’s apparently what babies do. We were completely spoiled with Emery! She never–and I really mean NEVER–cried unless she was either hungry, needed to be changed, or…no, that’s pretty much it. Jude, on the other hand, was much fussier. But that seems to be behind us (for the most part) now!
So far Jude is also a great eater–something I’m very grateful for. I’m exclusively nursing him and everything has been great. Both him and Emery learned to latch very quickly and I really haven’t had any problems. My goal is to breastfeed for an entire year so I hope we make it! I had the same goal with Emery and I made it to 11 months. After that she kind of weaned herself which was sad for me, but it happens. And 11 months is pretty good! So hopefully I can go just as long, or longer, with Jude.
At only a month old, that pretty much sums him up: sleeping better, staying awake and happy more, and eating great. When they are this young they are just so helpless! And cute! We really think he is just so cute. I think he looks so much like Emery and Grant thinks he’s starting to look different. We’ll see over time I guess if he remains her twin or if it’s just for the time being. Here’s a picture of them side by side at the same age. Jude on the left and Emery on the right:


————–
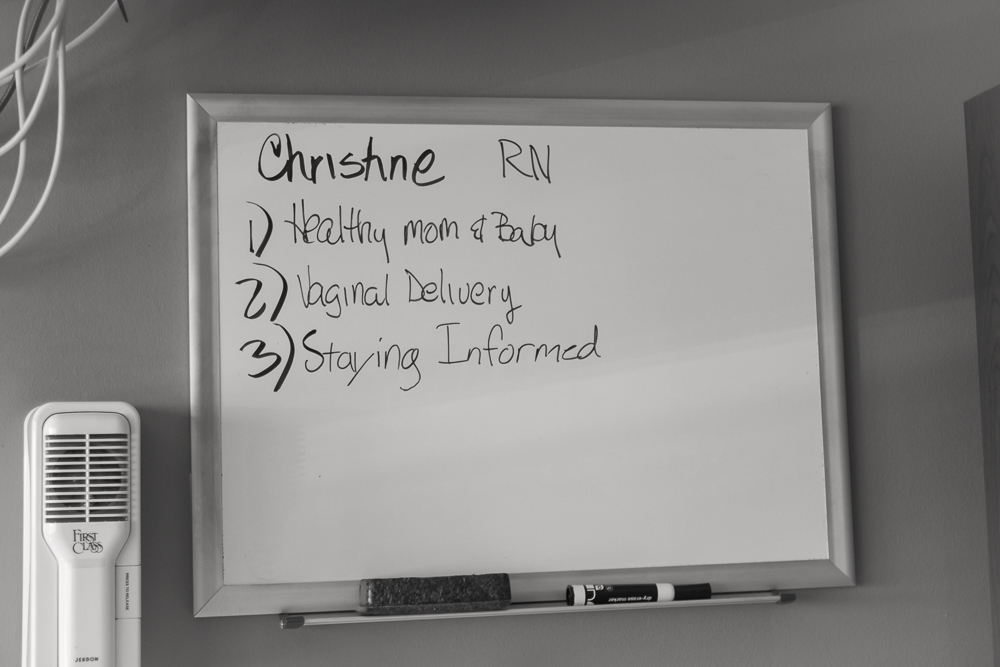
My experience with Jude was completely different than with Emery—something I am very grateful for! I really hated my hospital experience with her and always felt so disappointed that I had to get a c-section. So this time I was determined to have a v-bac, no matter what!! Technically if I had just opted for a c-section this second time around, I could have scheduled one at 39 weeks so Jude would have been born weeks earlier. I really wanted to give myself the chance to v-bac though, so I opted to let myself go into labor naturally. This part actually didn’t work out as I was 41 weeks and still there was no baby. My doctor wouldn’t let me go any longer, so she had me schedule an “augmentation.” She knew how much I wanted to avoid a c-section, so she agreed to “augment” me instead of inducing me. (If you’ve had a previous c-section, then you can’t be induced for a v-bac. If she had induced me, it would have been an automatic c-section, which is what I really wanted to avoid.) So instead I picked the farthest date out that my doctor would allow—November 10th—and was sure he’d come naturally long before that. After all, I had been measuring weeks ahead of schedule my entire pregnancy and anyone who saw me can attest to this. I was HUGE. And I’m really not exaggerating. When I finally went into labor, I was measuring 48 weeks pregnant. And was only 41! Pretty crazy…(and painful!).
Unfortunately all the walking, stair climbing, galloping, eating spicy foods, taking hot baths, squatting, dancing, and everything else I tried didn’t work. I didn’t go into labor naturally so I had to check in for my augmentation on November 10th at 7am. We met with my nurse shortly after, who turned out to be a straight miracle worker and then my doctor came in at 8:30 to break my water. Even though I didn’t go into labor naturally, I was pretty confident that the augmentation would work. I had been having strong contractions for over a month and was slowly progressing with each passing week. When my doctor broke my water I was already at a 4 and 70%. And I was right! Once my water broke, the contractions quickly became much stronger! I walked the halls for an hour or so in order to get the ball rolling even quicker. They were pretty intense at this point and I had to keep stopping to breathe through them. I was actually really excited about this! I didn’t want to be confined to the bed like I was with Emery and wanted to experience this part of labor. So even though my water had to be broken for me, I still feel great that I got to labor for a few hours on my own. Around 12:00 my contractions were more than I could handle while walking so we went back to the room and I requested the epidural. At this point I was at a 6 and 80% so I was feeling encouraged that the v-bac might be possible! (In order to have one, my body had to make it to a 10 and 100% on it’s own. If I didn’t progress, then my doctor told me I’d have to have a c-section.)
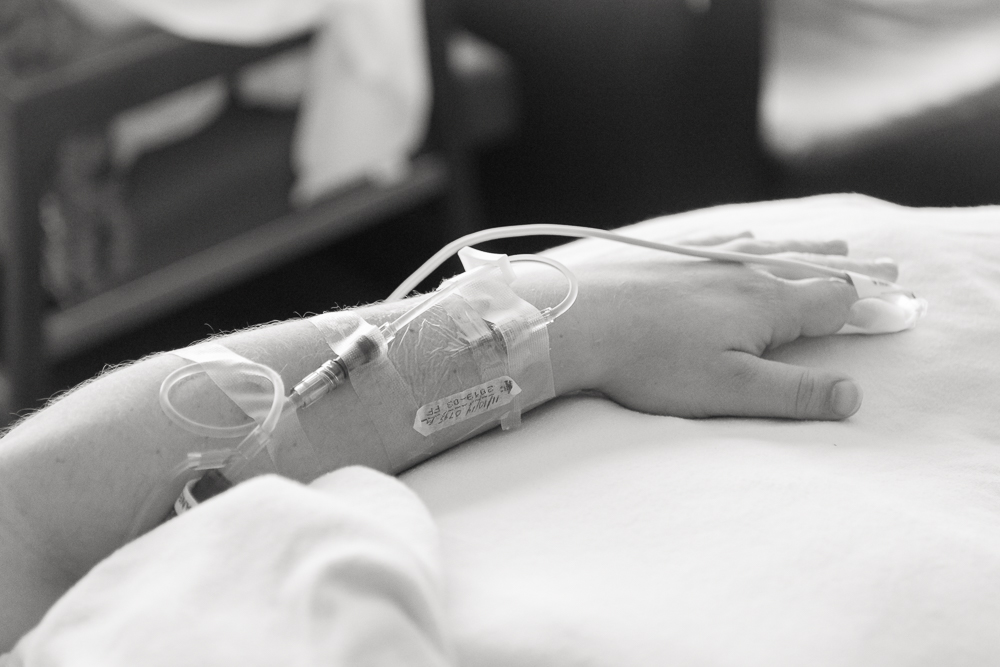
Once I got the epidural I was in bed, but it didn’t mean I stopped feeling the contractions. Unfortunately, it only worked on the right side of my body, so the left side was still in a lot of pain. My nurse told me if the pain was bearable that it might actually be beneficial because I’d be able to feel the contractions and know when to push and use it to my advantage. I took her word for it and didn’t up the dose. At 1:00 I was at a 7 and 90% and my doctor ordered for me to be put on a small dose of Pitocin. This kicked my contractions into high gear and within the hour I was completely dilated and effaced! However, the pitocin made my contractions come one after the other without giving my body a break. This put a lot of stress on Jude and we had quite a scare! Around 2:20 I had a swarm of doctors and nurses rush into my room, suddenly had a nurse give me a shot in the arm without saying a word, and had another nurse quickly hook me up to oxygen. Grant and I had NO idea what was going on! My doctor came in and started speed-explaining how the baby was stressed and his heart rate had plummeted. The shot they gave me was Turbuline, a drug that stops contractions but speeds up my heart rate. So as a result, my contractions had a little break but the rest of my body was freaking out and shaking. My doctor started telling me how she wasn’t going to mess with this and if it happened again, then she’d automatically c-section me. She even ordered for an OR to be prepped. In that moment I just looked at Grant and started crying. I couldn’t really talk because 1) I was in shock from everything that had just happened in a matter of minutes and 2) I had the oxygen mask on. He just rubbed my arm and tried to console me, but I could tell he was freaked out too.
Luckily putting me on Turbuline and taking me off Pitocin helped a lot and gave my body enough time to rest and helped Jude recover. Then at 3:00 I was able to start pushing! This was absolutely the worst and best experience of my life. The pain I was in was miserable. I mean absolutely miserable. I never had my epidural adjusted so I really felt as if the left side of my body was being ripped open from the inside out. I was pretty sure my uterus was rupturing (which is the risk of a v-bac after a c-section). Turns out that was just normal contractions! So to those moms who have given birth naturally without drugs: you are AMAZING. I could never do it. I’m sure of that now.
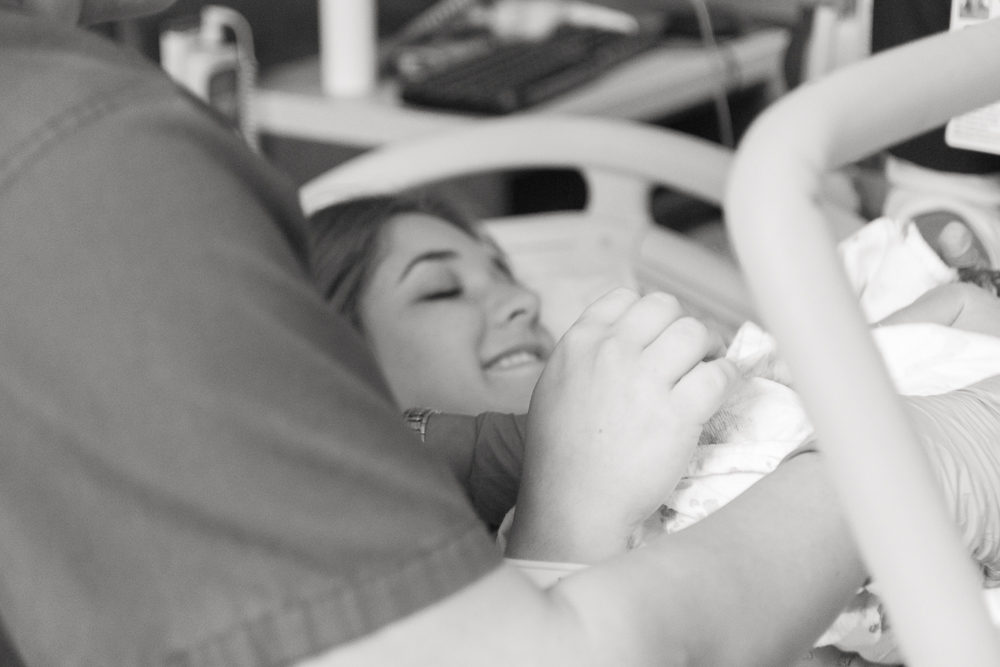
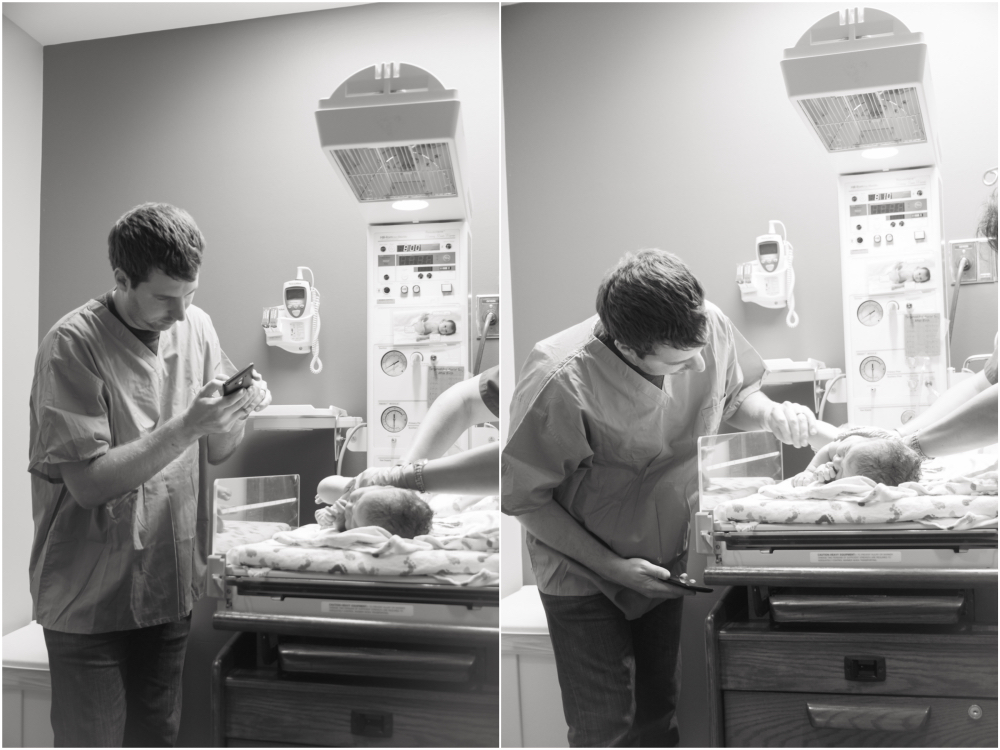
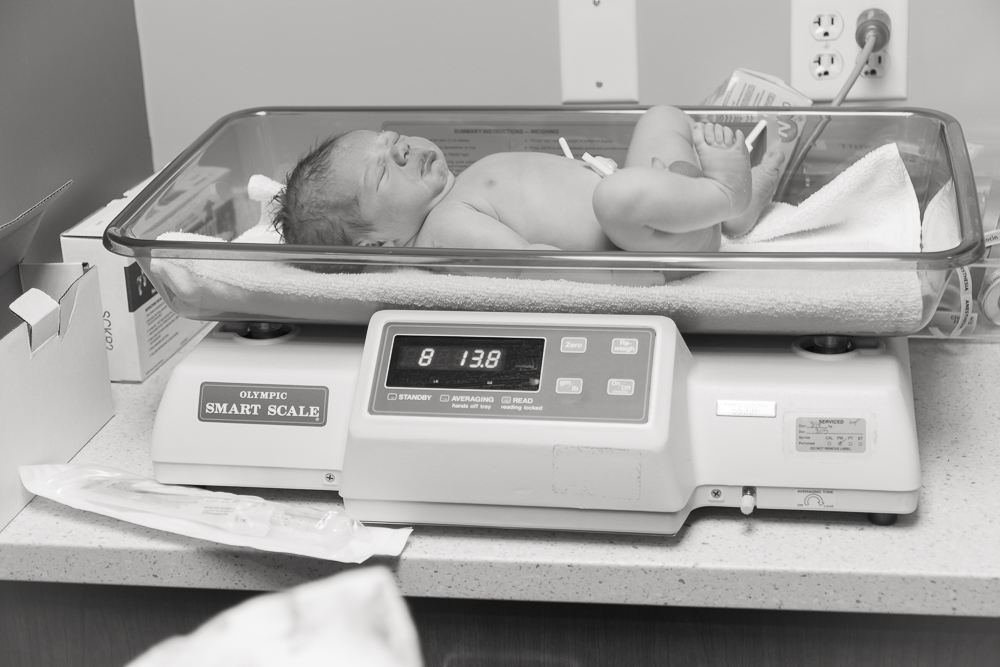
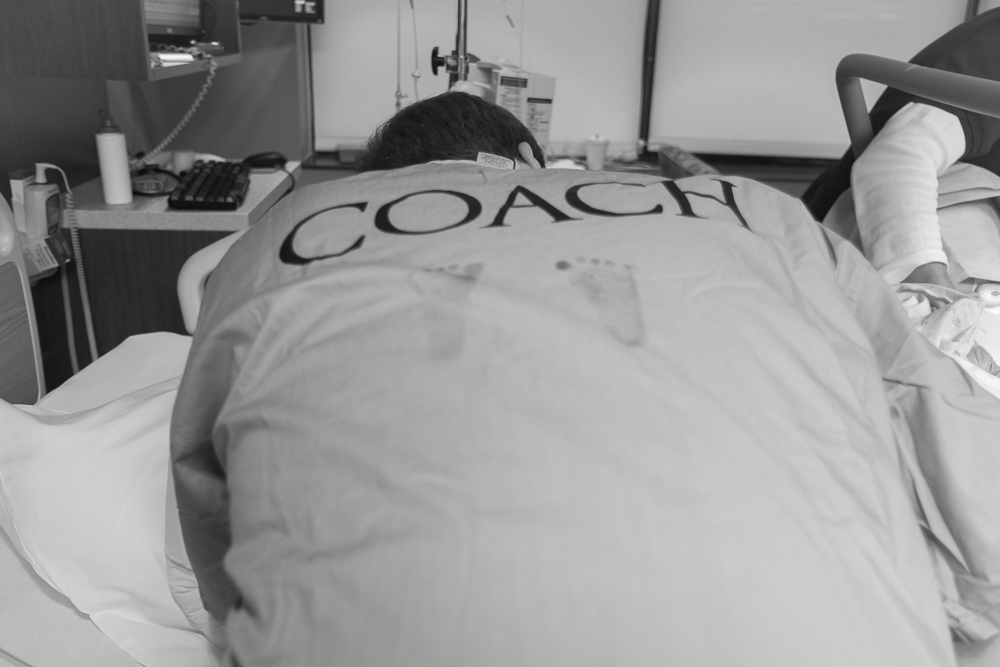
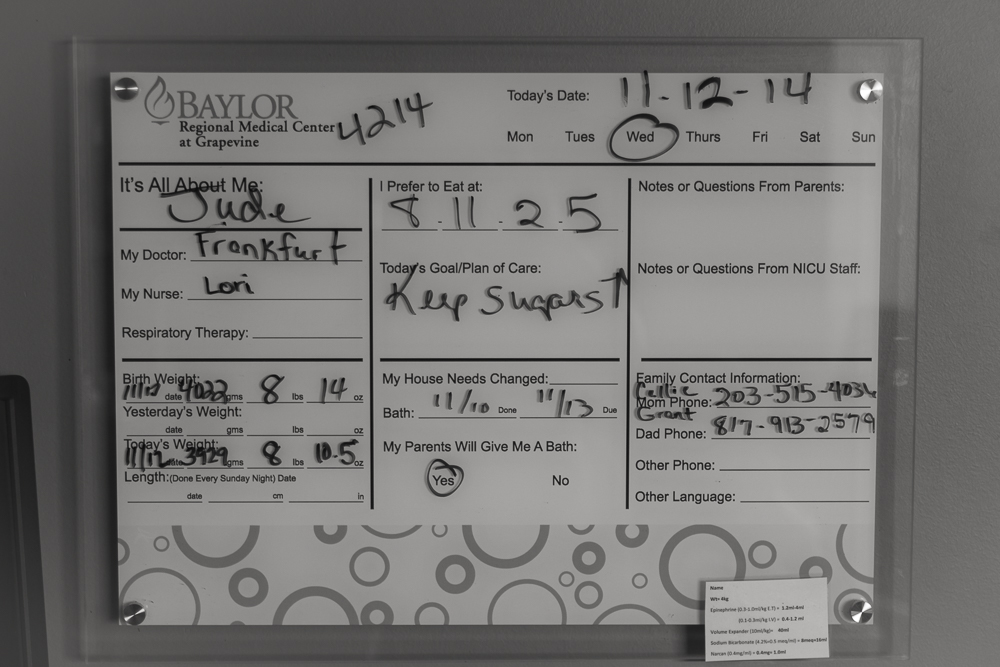
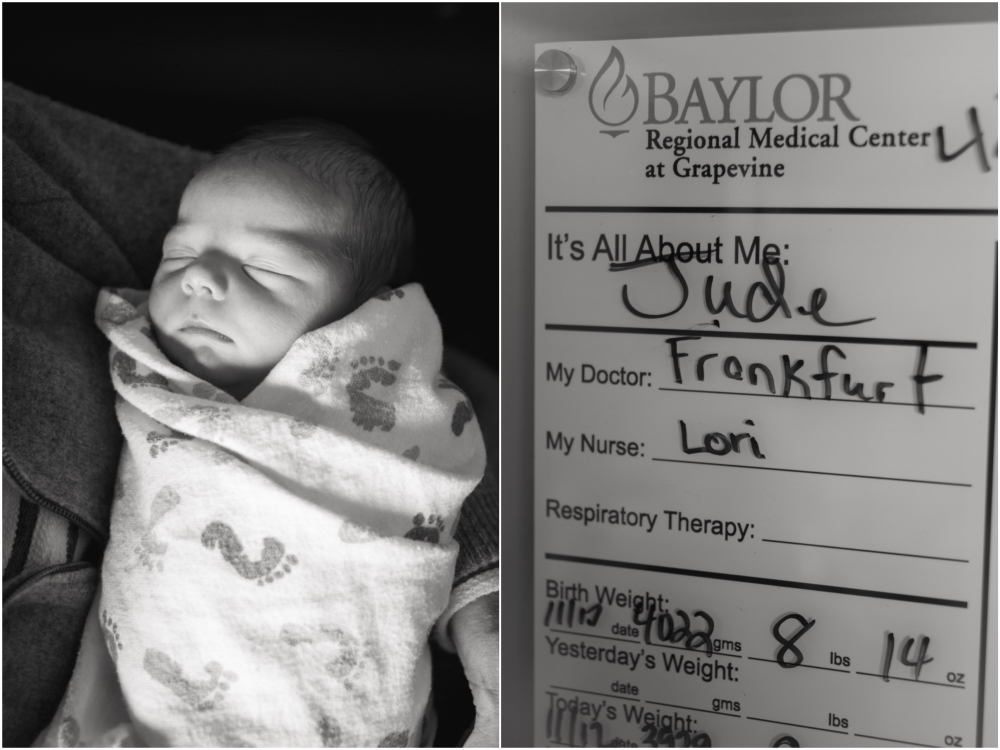
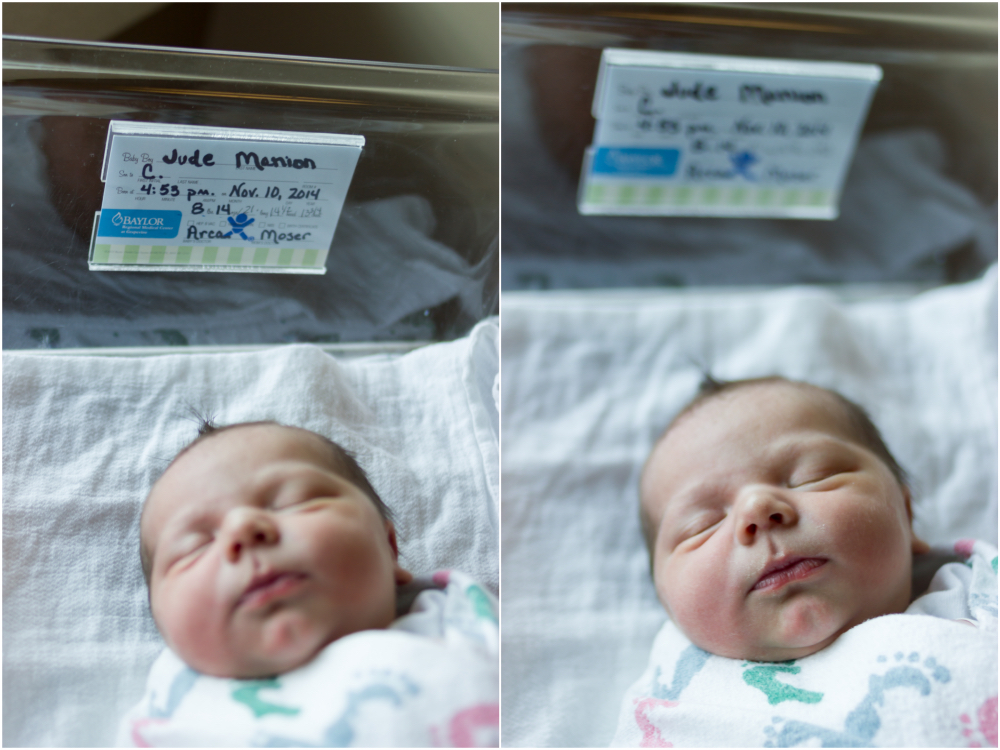
I pushed for an hour and a half and Jude was still not coming down very far. I was getting really discouraged, thinking he was going to get stuck like Emery did and my doctor would come in, take one look, and order for me to be sent to the OR for a c-section. Luckily I had expressed all my concerns to my nurse early on. She knew how important it was to me to v-bac and she seriously was a miracle. She sat with me and helped me push the entire time, encouraging me and instructing me. Finally at 4:30 the pain was just too much and my pushes weren’t strong enough since I was focusing more on the pain. The nurse called the anesthesiologist and he adjusted my epidural. At last I had some relief and was able to really give it my all! I also had a mirror pulled out and as gross as it may sound, it helped me SO much. Being able to see the progress I made when I pushed really motivated me. For the first time I really though, “This is possible!” and I kicked it into high gear. Then, an amazing thing happened: Jude came down and when he was crowning, they finally called my doctor. She came in and was completely amazed that I had done it. (Which also showed how much faith she lacked in me having a v-bac in the first place.) Then at 4:53, Jude was born! He weighed 8 pounds, 14 ounces and was 21.5 inches long.
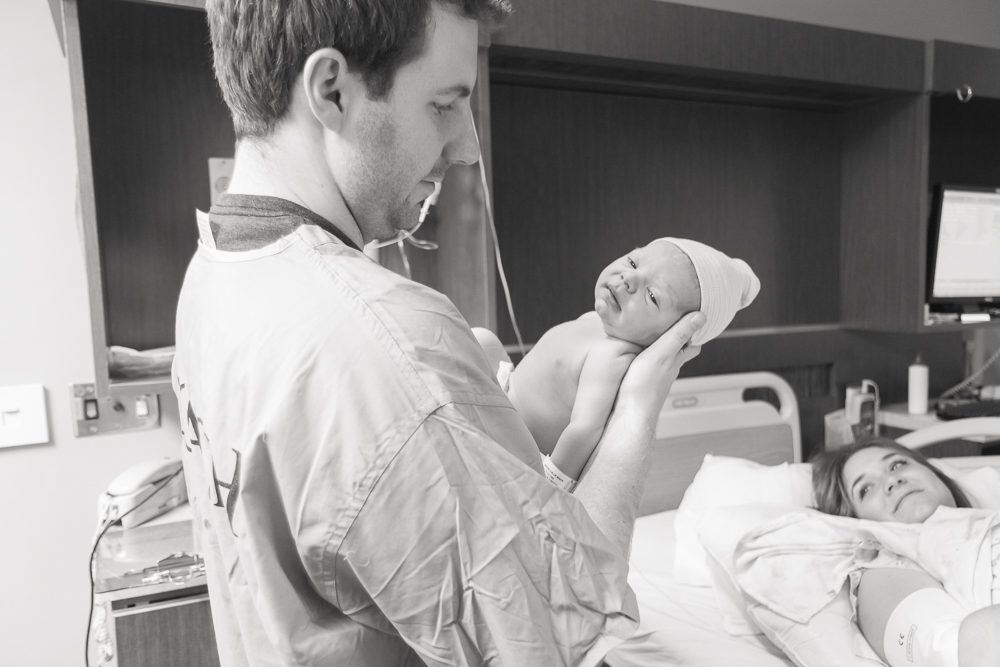
Like I said: it was the most miserable experience of my life, and yet, also the best. I felt so empowered! I really feel like after birthing an almost 9-pound baby, I can do anything! After Emery’s birth, I felt so discouraged. I hated the entire experience and felt like I never wanted to have kids again. After having Jude, I feel like I could definitely do that again—even with all the pain. It’s a crazy mix of emotions. But watching him being born and then holding him in my arms… It was the most incredible feeling. And Grant all the while was just awe-struck. We both were!
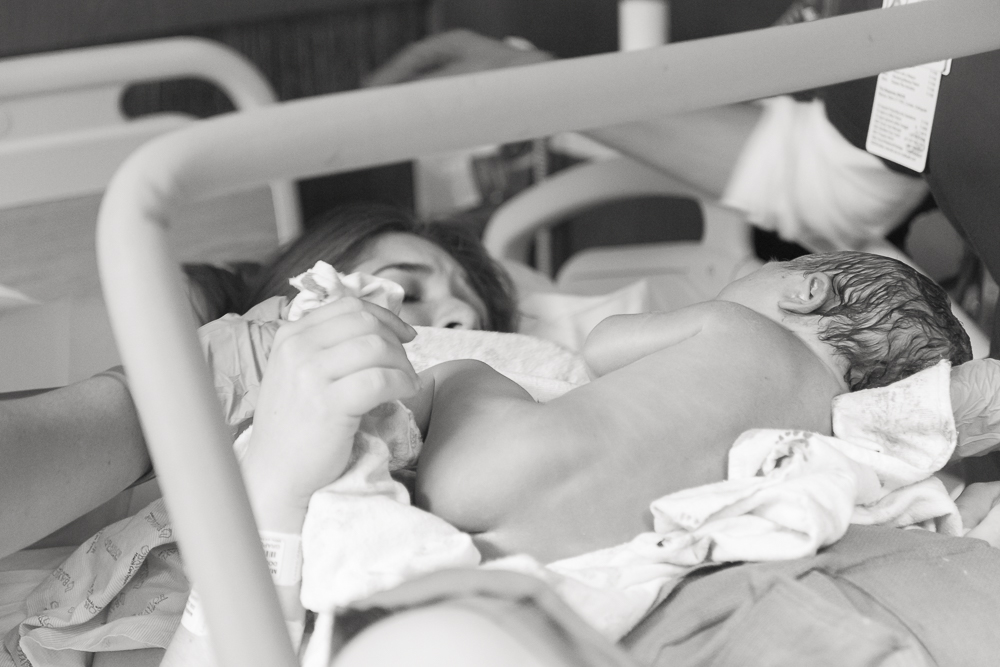
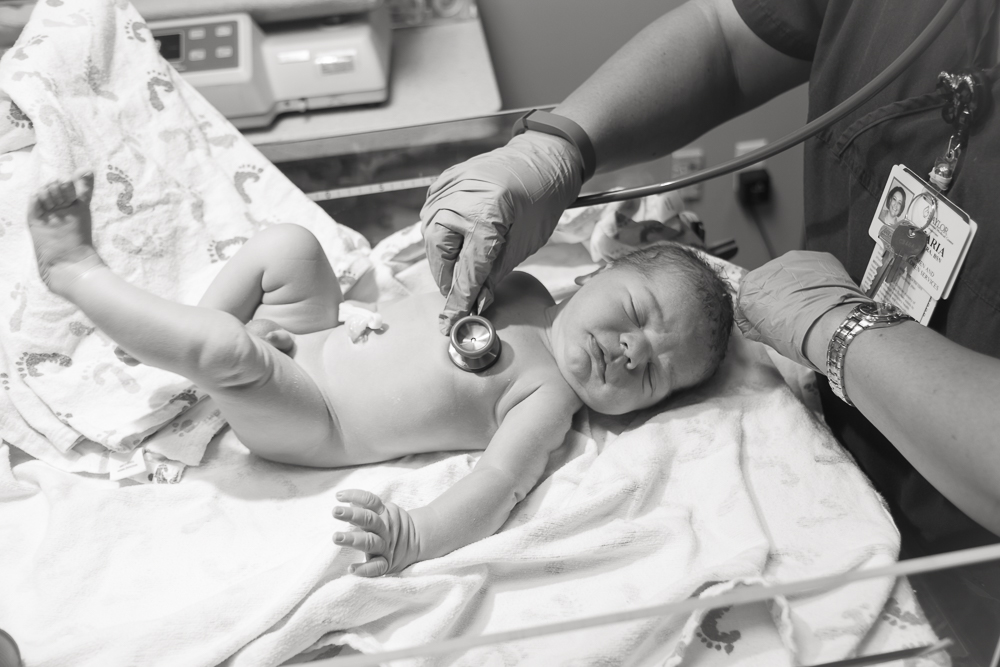
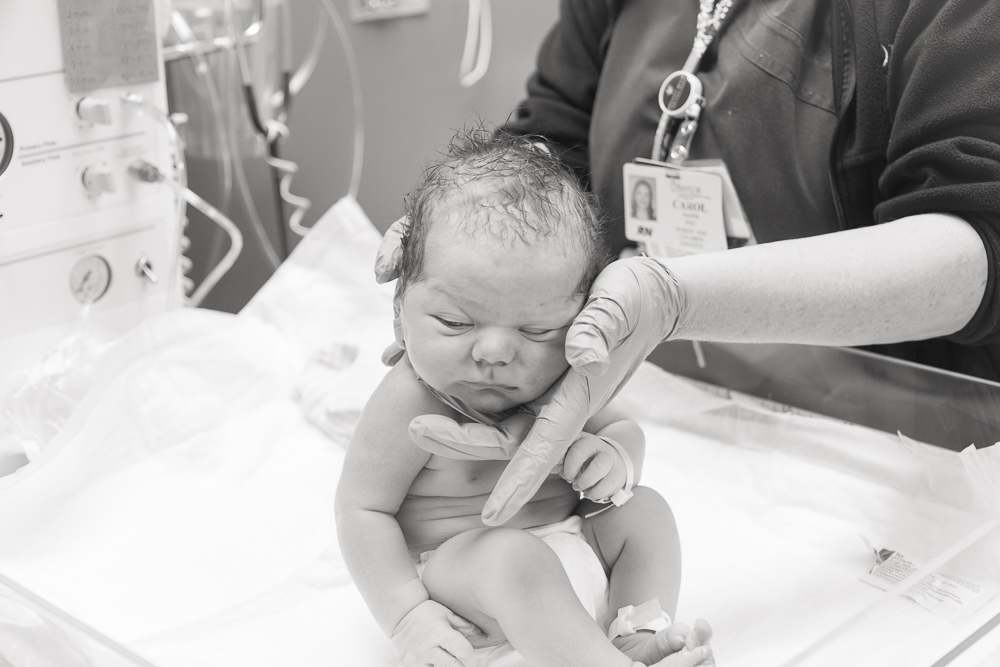
I’d like to say everything after this point was pretty standard but unfortunately that wasn’t the case either. They checked his blood sugar after he was born and it was low, so they had me breastfeed right away, hoping that would bring it back up. I think it came up a little bit, but not enough to satisfy the nurses. So they rushed him off to the nursery for an IV and a bottle of formula—two things I was very unhappy about! First of all, he hadn’t even been alive two hours and already they were taking him away from me. Second, I didn’t want him to have to be hooked up to an IV! And third, I really didn’t want them to give him a bottle or formula! Sigh. Things never go as planned. And it’s not like I had any say in the matter, so they took him away.
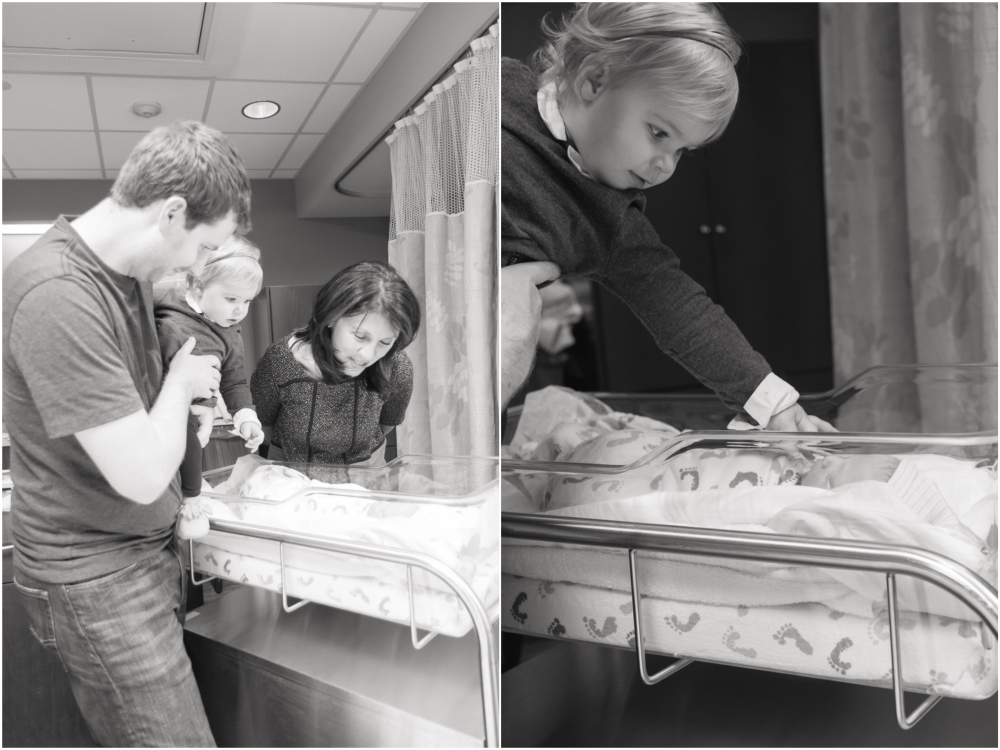
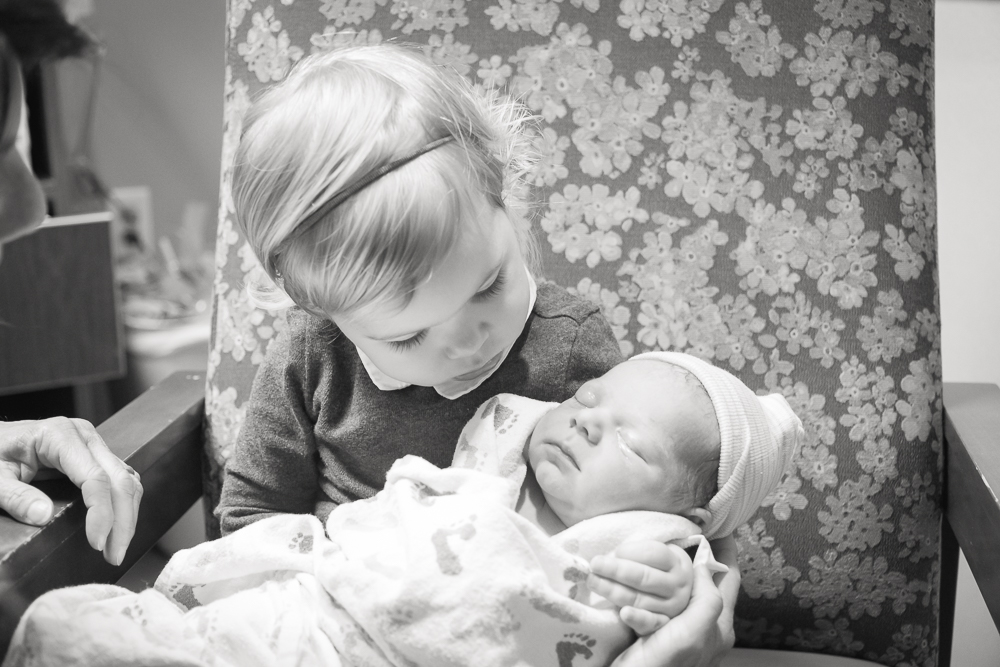
When they brought him back my mom and Emery came to see him and watching Emery meet her little brother was really touching! She immediately wanted to point and name all his body parts. Then she wanted to hold him! Grant and I had been practicing with her for weeks with a doll, so we were really excited to see how she’d react to Jude. She was very sweet to him and gave him lots of kisses. It was getting late though so my mom took her home to bed, while Grant and I went over to postpartum. We were able to be with Jude that night, but in the morning we were shortly informed that he was going to have to go to the NICU. I was really not happy about this. They had been checking his blood sugar levels before each feeding and although they were low, they were still technically in the “normal” range! Just on the very low end of normal. Still, I felt like he didn’t need to go and they were just taking him away to make it easier on them. They could have kept him in our room and continued checking his blood sugar levels there. But instead they insisted he go to the NICU to be monitored. This means we were left alone in my room without him. I was so upset! I didn’t have that time to bond with him like I did with Emery. Even though we could go to the NICU to visit him, Emery couldn’t. And it was really important to me that Emery get to be with her little brother at the hospital and start associating good things and a happy experience with the baby. All those plans were totally thrown out the window. We tried to make the best of it and switched off who would watch Emery outside the NICU while the others went in to be with Jude, but it just wasn’t the experience I had been envisioning for weeks. He stayed in the NICU all day (Tuesday) and night. It was definitely the hardest on me at night, because it was important for me to nurse him. This meant we were waking up and making the long walk over to the NICU several times in the night to get him so I could breastfeed. That next morning we were hoping for good news, but the doctor made the call that he’d have to spend another 24 hours there. We were really bummed but there wasn’t anything we could do about it. We spent the day (Wednesday) visiting him at the NICU and taking turns again with Emery outside.
Everything was looking good on my end though—which was completely different than my experience with Emery. The morning after I delivered her, my doctor ordered for me to be put on Magnesium because I got preeclampsia. It was the worst. This time around, I was up and walking that same night and moving around just fine the next day. The way I felt was completely different than with Emery, which really encouraged me to keep going. Because I was going just fine, I was discharged that afternoon. Jude, however, had to stay in the NICU for another night. Luckily we were allowed to “room in” over there so they set us up with a room that was inside the NICU, and the best part was we were able to have him in our room! Why they didn’t just offer this to us in the first place, I have no idea. But we at least got the chance to be with him on the second night. They still were monitoring his blood sugar levels but they were consistently getting higher and looking good. That night went smoothly and then the next morning we finally got the word that we could take him home! SO around noon on Thursday we finally left!!
Looking back, I know it was smart for the doctor to monitor Jude, I just wish it hadn’t happened. It was really sad and frankly, pretty weird, to be without the baby you just spent hours laboring and delivering. But all that we care about now is he is healthy! He had his follow-up appointment with our pediatrician on Friday and everything looked great, so we are feeling pretty good about that! It feels so good to finally be home with him and Emery. She’s been so sweet and so far just wants to help. She loves to get blankets for him and rock him (although we’re still working on being gentle). She also makes the cutest concerned face every time he starts to cry. And she seems to really understand what we tell her about him: how he drinks mommy’s milk; how when he sleeps she needs to just look, not touch; how when he cries it’s because he needs something, like a diaper change or milk. I can’t wait to watch these two grow up together. I have a feeling Emery is going to be a really good big sister!
xxx
]]>
Materials:
- Purple shiny fabric (the amount depends on how big your costume will be)
- Batting
- Mop
- Styrofoam balls, 2
- Sharpie
- Black pipe cleaners, 2
- White felt
- Thread
Process:
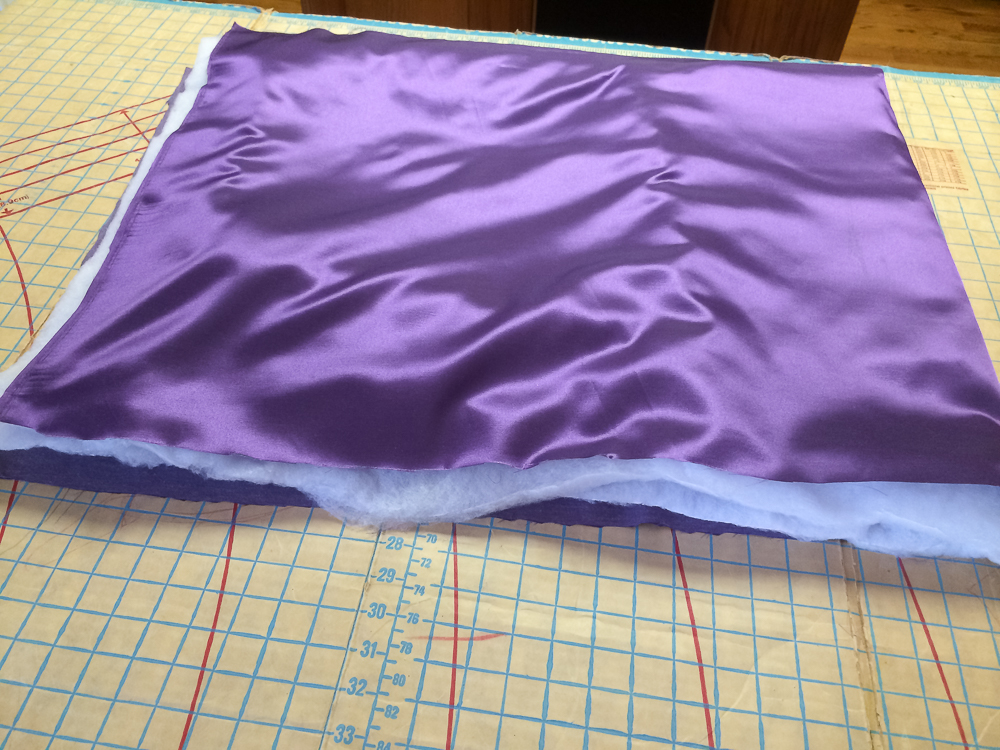
1. It’s hard to say exactly how much fabric to buy, since every costume will require a different amount. I believe I bought about a yard and a half for Emery’s, since I wanted it to go to her knees and fit all the way around her. I actually had a ton left over, but I’d rather buy too much than too little. So after collecting my supplies, I started by first cutting out two rectangles of the purple fabric in equal measurements. I laid the first rectangle out, then covered the fabric with a few layers of batting (how much you use depends on how puffy you want the costume to be), and then put the second rectangle on top. This forms the main part of the costume.
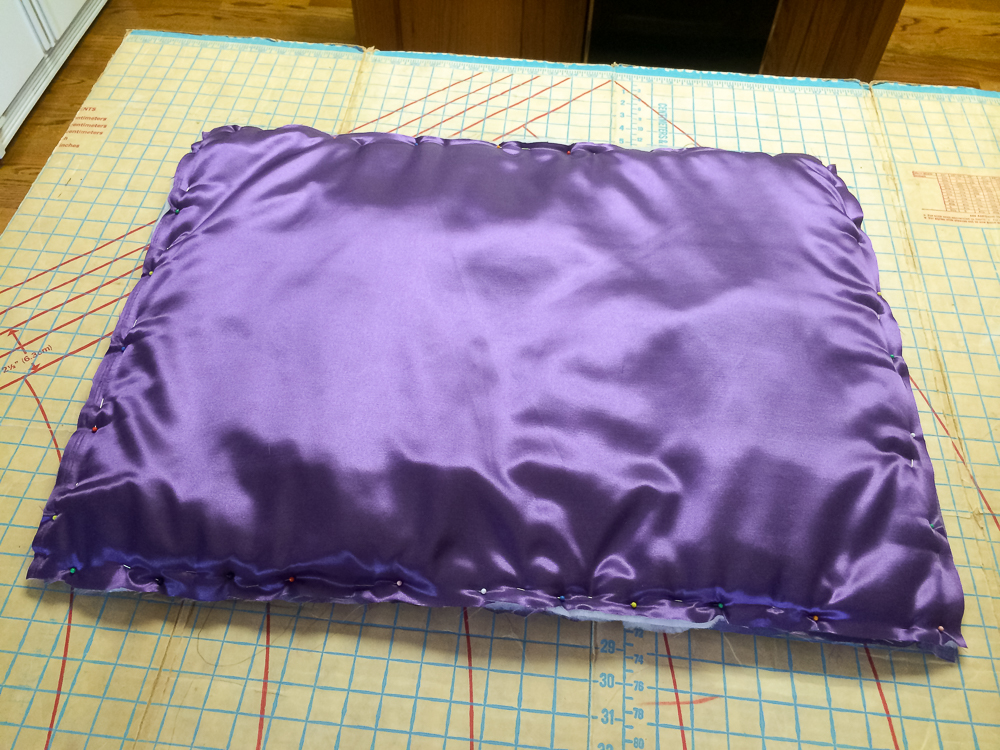
2. Next I pinned all around the rectangle, securing all the layers together.
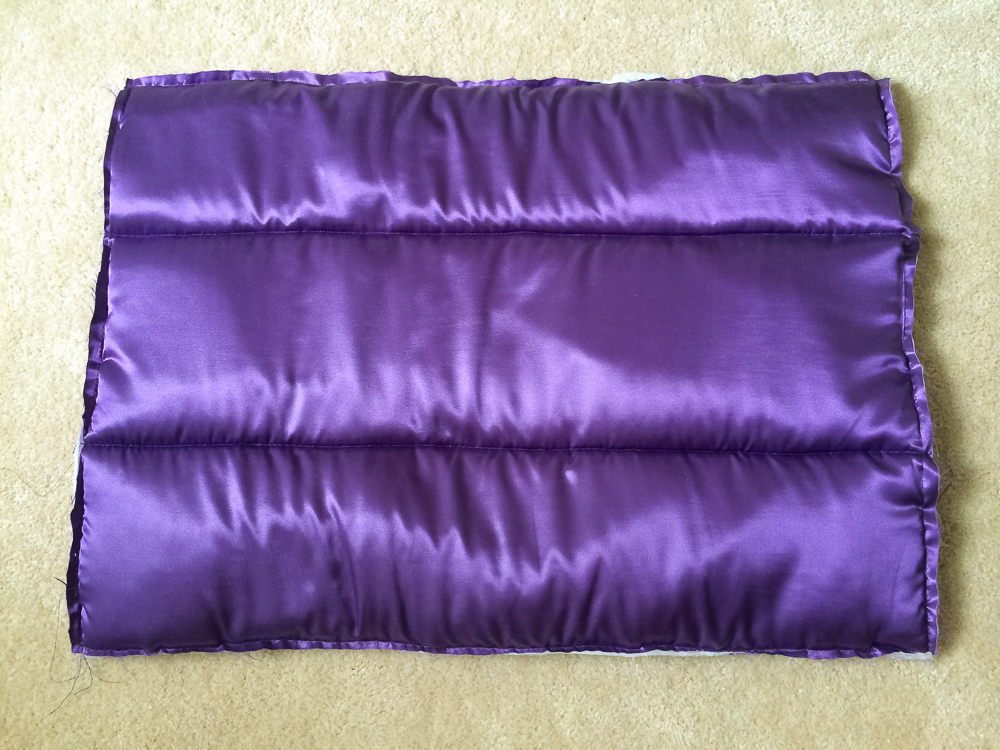
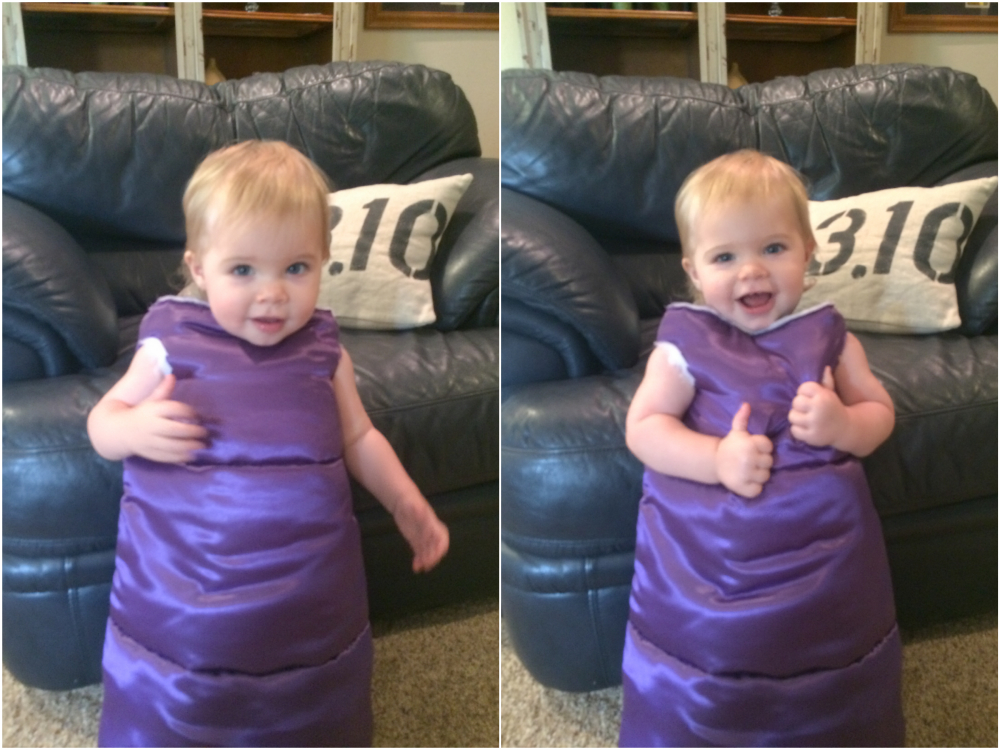
3. Then I went ahead and sewed a straight stitch around all four sides. This will give you the body of the costume. Now to get the true “Boo” look, you just need to sew three straight stitches across the length of the rectangle, to give it that quilted look. Essentially you’re just making a little sleeping bag! It’s very very easy!
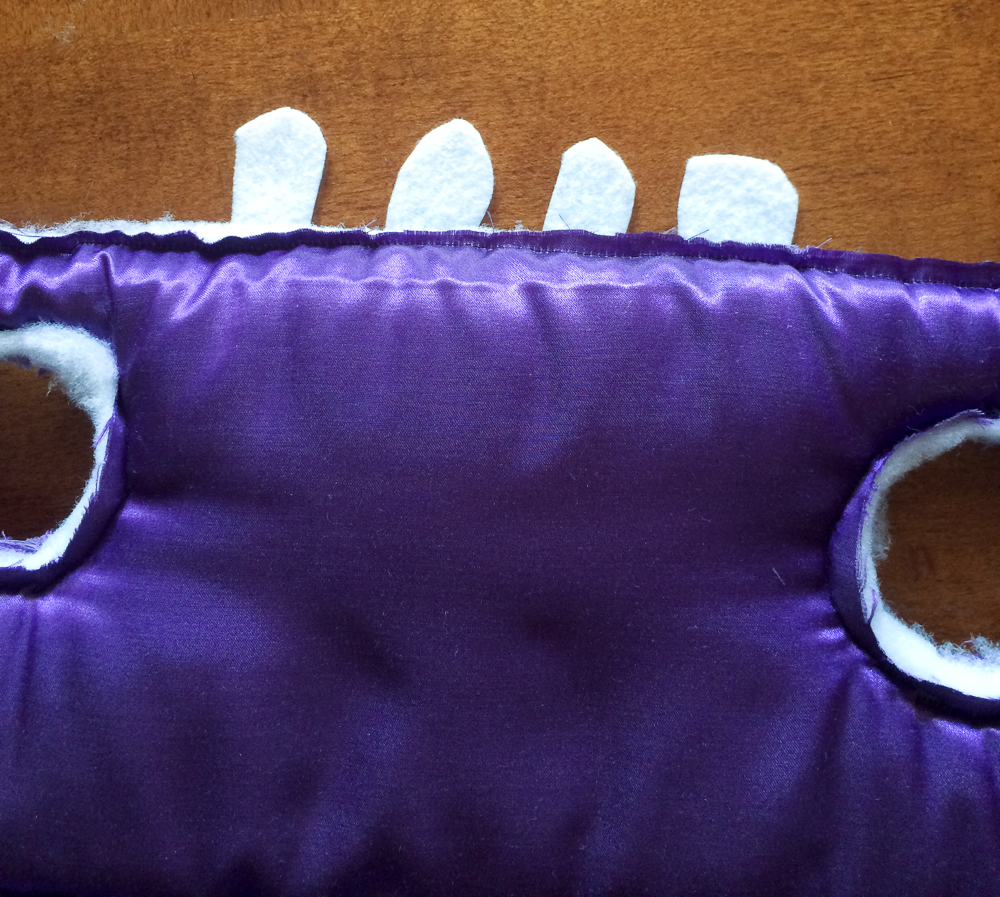
4. I then took the rectangular body and held it up to Emery and tried to gauge where she’d need arm holes. I’m sure there’s a more sophisticated and exact way of doing this, but I just folded it around her, marked with my finger where I thought her arms would go, and then used scissors to cut holes. I went back to my sewing machine and sewed around the edge of the holes, so the fabric wouldn’t fray and the batting wouldn’t fall out. It definitely didn’t look professional by any means, but I was happy with it!
5. Next, I grabbed some white felt and cut out shapes that would serve as the teeth. I went back to my sewing machine and sewed on a few to the top of the rectangle. This doesn’t have to be perfect either, since the whole point of Boo’s costume is to look home-made!
6. And that was it for the body! All I had to do to finish it up was stick some velcro on the back and close it up around her. Sorry I don’t have any pictures of this process, but trust me: velcro is super easy! You don’t even need to sew it down, as long as you buy the adhesive kind. I actually waited until the party got closer to do this step, to make sure that I’d have the fit correct (in case she grew a little over the weeks before the party).
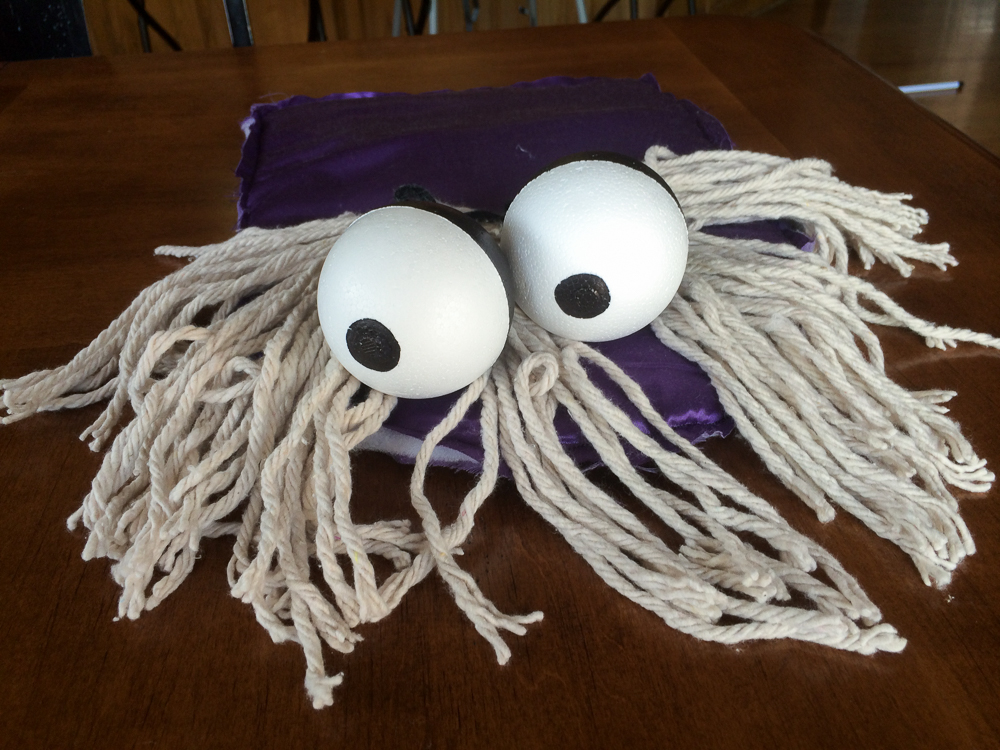
7. The next part of her costume was making the hood! I wish I had better pictures for you of the process, but I completely forgot to take them until after I was finished. It was very simple though! I basically repeated the steps I did above by first cutting out two shapes of the purple fabric, laying batting between, pinning it and then sewing it together. I decided to make things easy for myself and instead of putting in a wire or something like that to shape the hood, I just made a tongue shape. It was basically a long rectangle, with one of the short ends being rounded off. This way I could attach the straight edge to the back of her costume and it would be long enough to come up over her head and sit right on top. It worked out really well! You can see the basic shape in the image below.

8. And to finish off the hood, you just need to add the mop hair and the eyes! This was really fun to do. Once the hood was sewn, I cut the mop “hair” off my mop and worked on hand-stitching it in sections to the top of the hood. It was actually very easy to secure. I then took the two styrofoam balls I bought and drew on the eyes. I poked a pipe cleaner through each one (and secured it with hot glue, just to make sure it wouldn’t fall out), and then wrapped the end of the pipe cleaner around the base of the mop hair (you can see what I mean by this in the picture above). I also hand-stitched around the pipe cleaners to secure them to the hood. And that was it! Using pipe cleaners was great because you can mold them to make the eyes be as long and whatever shape you want them to be.
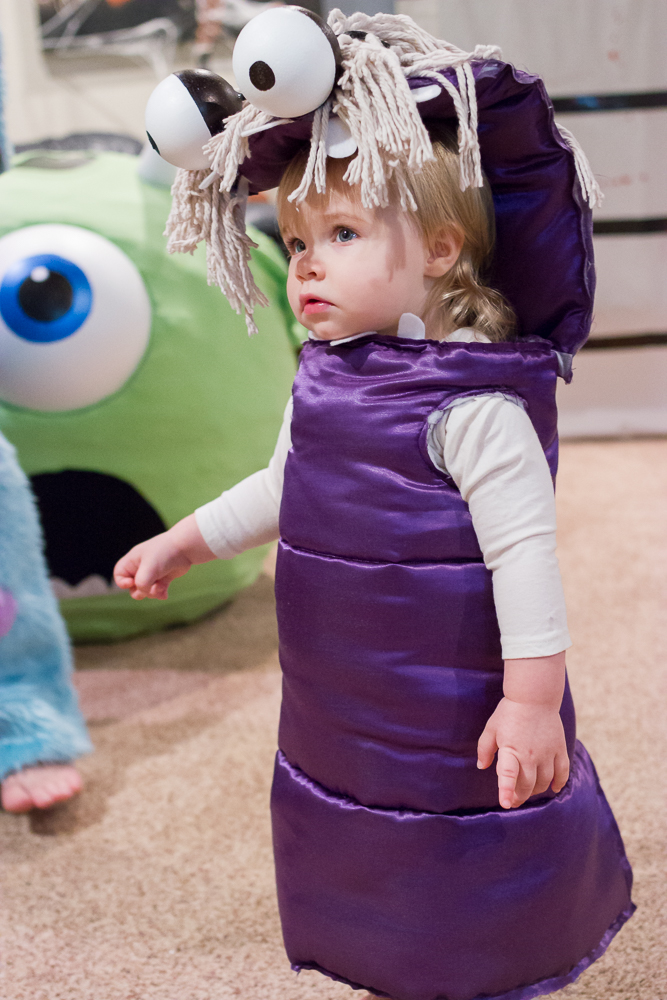
9.After I took the above photos I decided to add a few teeth to the hood too, so I went back and cut out a few more shapes from my white felt and then hand-stitched them on in random places. Very simple! And you can see how they looked in the final picture below.
10. Securing the hood to the body was just a matter of getting more velcro and attaching the short and straight edge of the hood to the very back of the rectangular body. Just use adhesive velcro and it’s a cinch! I then finished off Emery’s look by dressing her in a long sleeve white shirt and white pants underneath. She surprised me by how much she liked wearing her costume. Every time we’d go to fit it on her while I was making it she’d cry so I was really nervous! But the night of the party she wore it without complaint and seemed to enjoy it! And she looked so cute!!
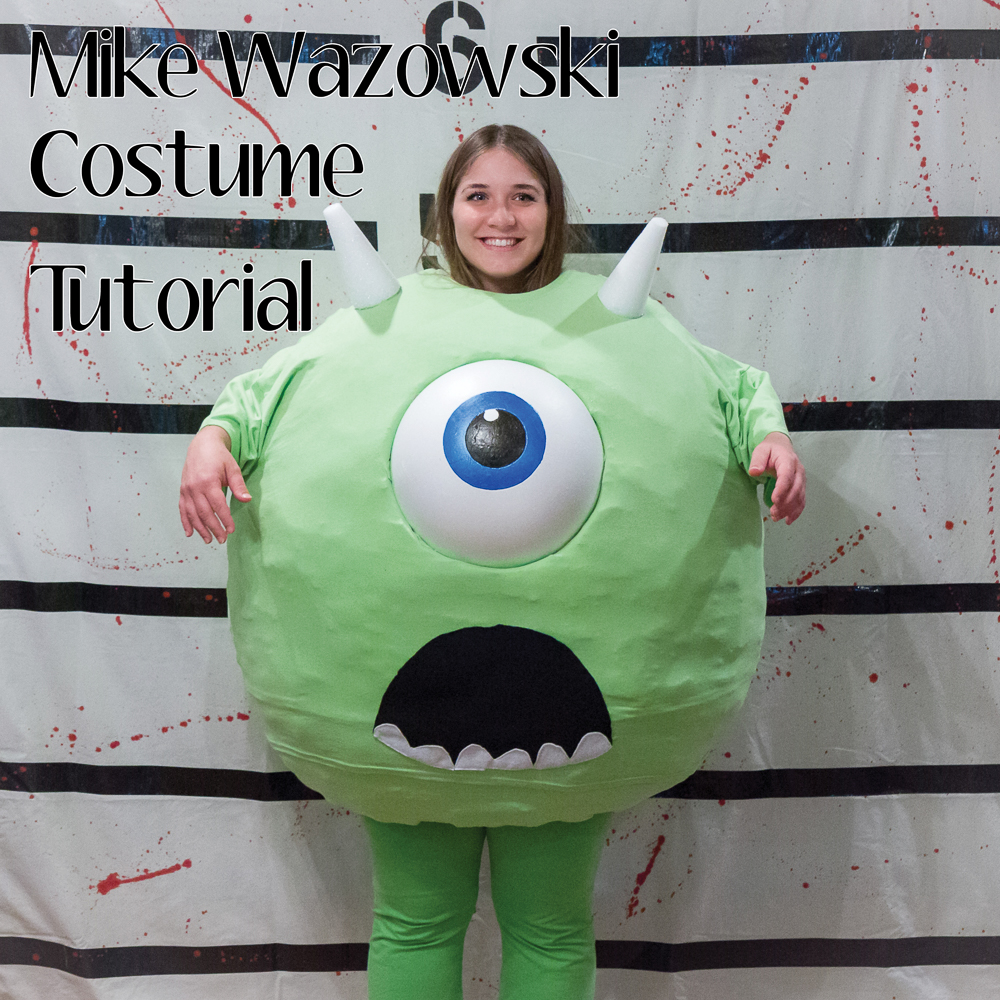
Materials:
- Giant yoga ball or inflatable beach ball
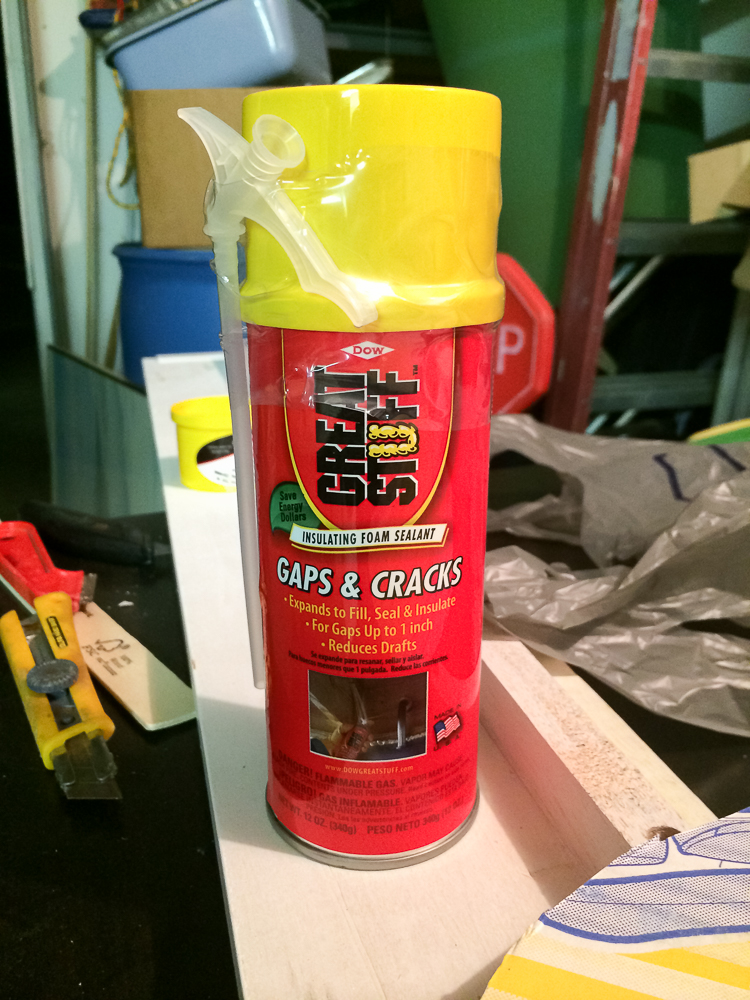
- Great Stuff insulation foam
- Green tshirt(s), size 6XL
- Foam half-ball
- Foam cones, 2
- Paint (blue & black)
- Felt (blue, black, & white)
- Green pants
- Green tshirt (to wear underneath)
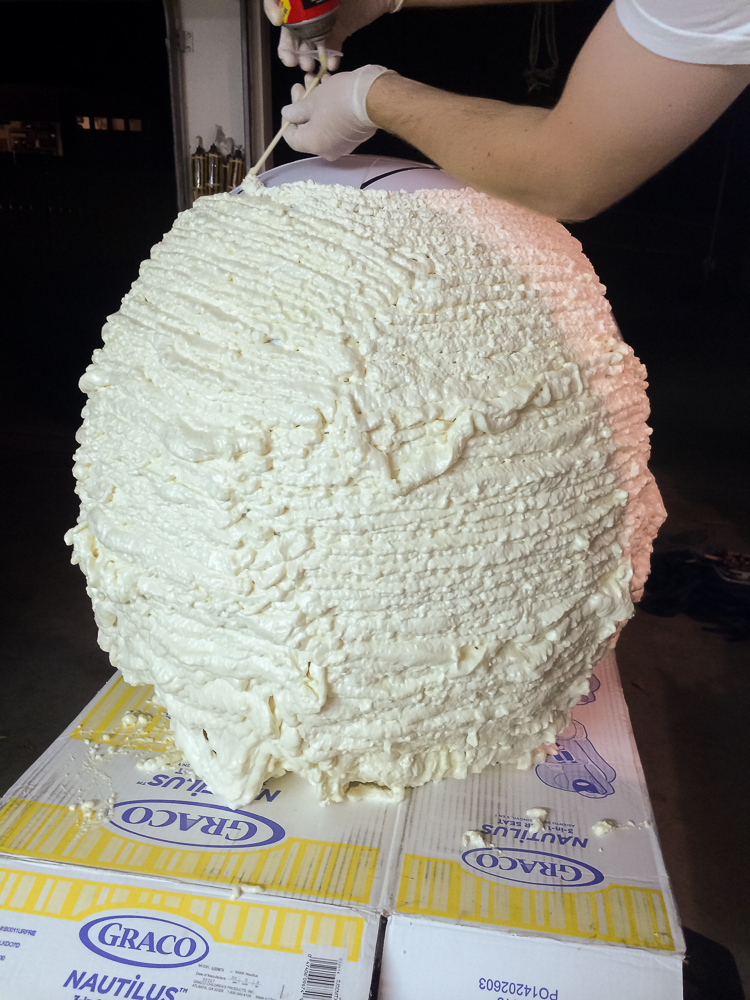
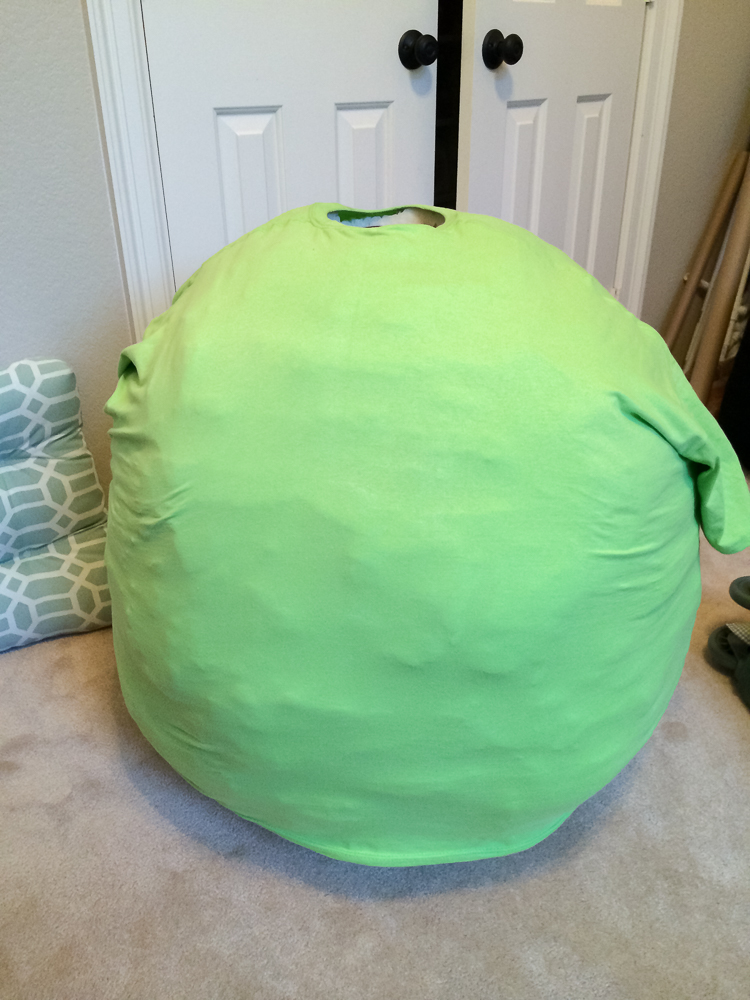
1. I did a lot of research trying to come up with the best way to create a circular costume. I knew I could always paper mache, but we did that last year for our Lucy and Charlie Brown heads and it took forever, so I was not excited about the idea of doing it again on an even larger scale. I had one friend suggest I sew a beanbag cover and then attach it to a tshirt and stuff it. I thought this was brilliant but when I started looking into it found out it was going to be a pretty expensive option because of the price of fabric, plus it would end up looking pretty lumpy. I then found another option: spray foam insulation! Who knew! I read and watched a lot of videos of people using Great Stuff to make props and cosplay gear and I thought it looked like a good solution. It was definitely faster than paper macheing, although more pricey. I decided the extra cost was worth it though because I really didn’t want to take the time to paper mache a giant yoga ball. So Grant and I went to Lowe’s and picked up about 5-6 cans of Great Stuff (found here), I ordered a giant inflatable beach ball off Amazon (this one), and then we got to work!
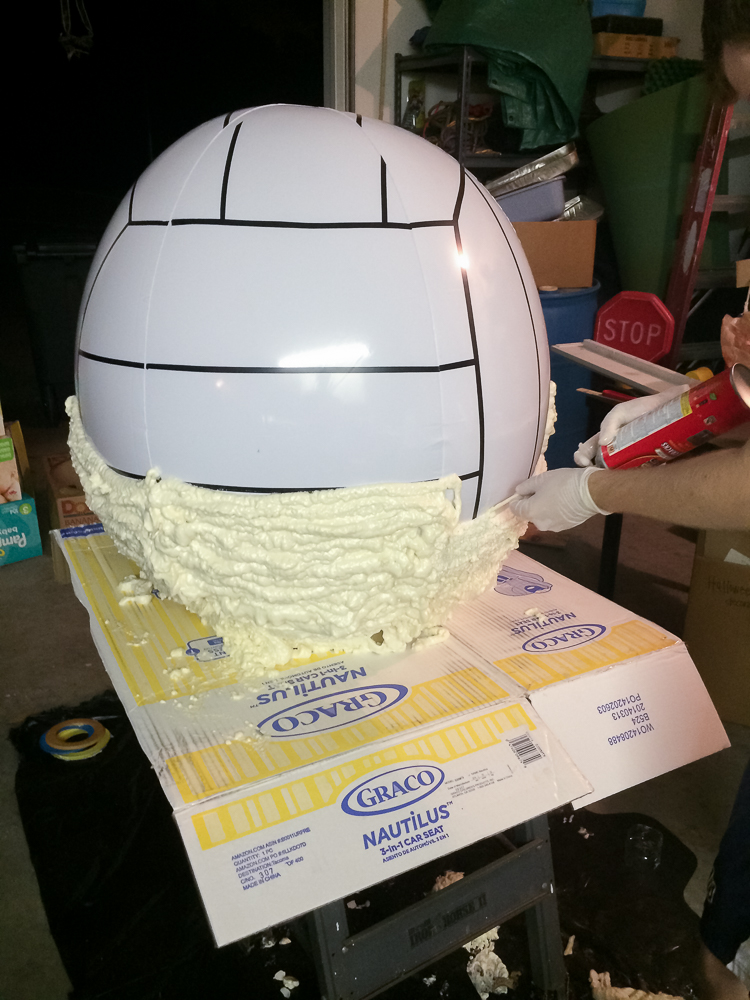
2. We did all the foaming outside in our garage and for our very sophisticated set up we simply laid a big sheet of plastic down, set up two saw horses on top and laid a giant piece of cardboard across them with a hole cut out so the ball would fit securely on top without rolling around. We then put on gloves, uncapped the can of Great Stuff, and started foaming! We worked from the bottom up, so the foam would build on itself, making it more likely to stick and not fall off. We had to go slowly and it was important to spray the foam as evenly as possible. If we sprayed too much at once, the foam would get heavy and fall. Grant did most of the spraying and then I went behind him smoothing out the foam and helping it to stick to the ball. This is why it’s important to use gloves! You don’t want this stuff sticking to your skin!
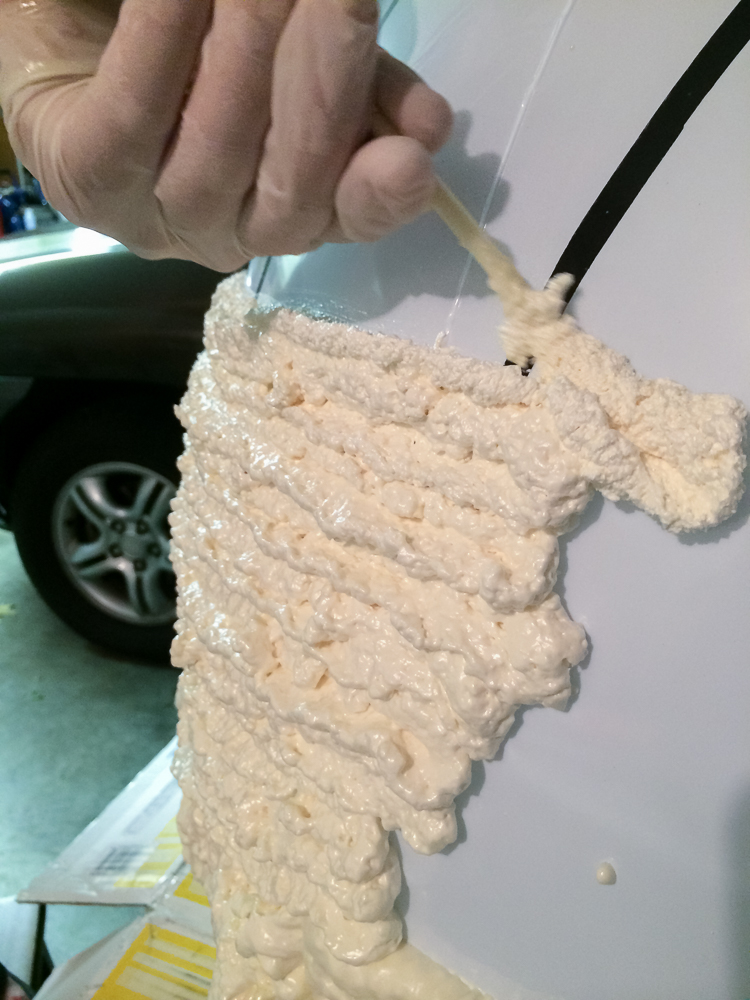
3. Once we got the hang of it, it was actually pretty simple. And really cool to watch! The foam expands to 4 times its original size, which helps cover more surface area. So after we had covered the ball we let it dry over night. I also read online that misting it with water helps it to cure, so I did that before we called it a night. When we came back the next day, it had hardened and looked great!
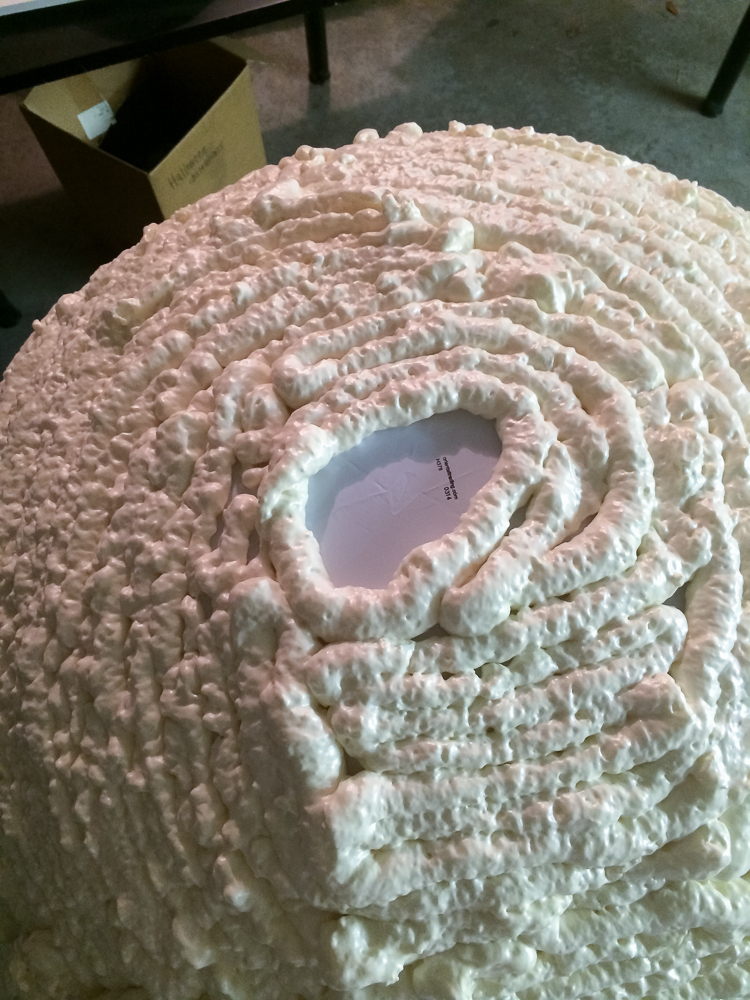
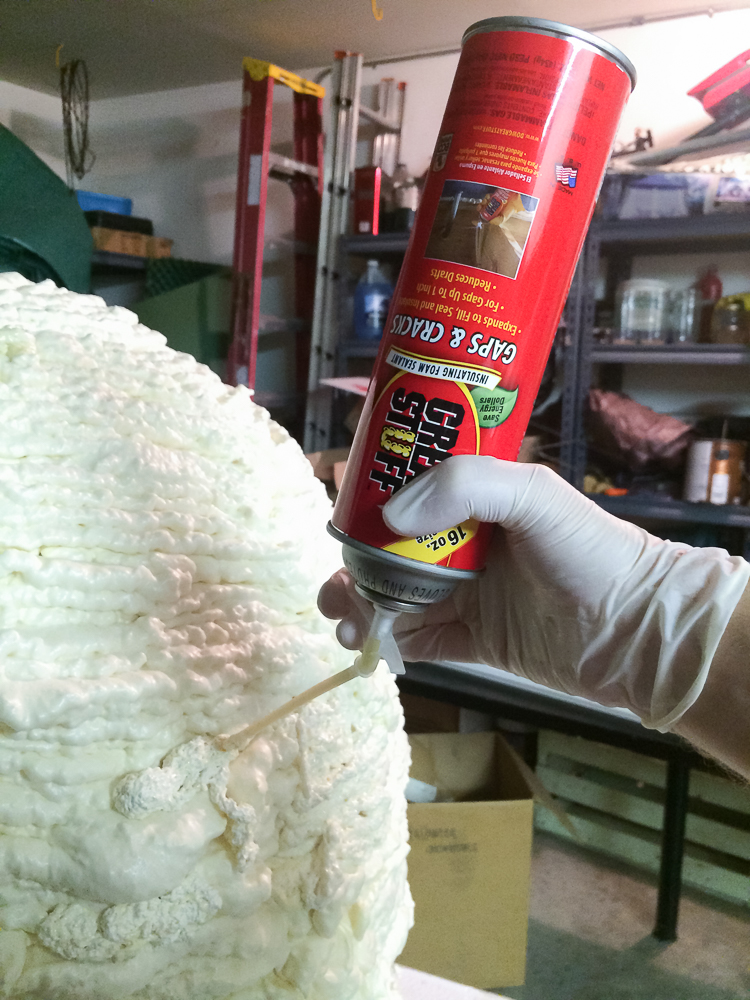
4. We noticed a few spots that weren’t as well covered as other areas, so we went back over those gaps and filled them in with a little more foam. Afterwards, I again misted the areas with water and we let it dry.
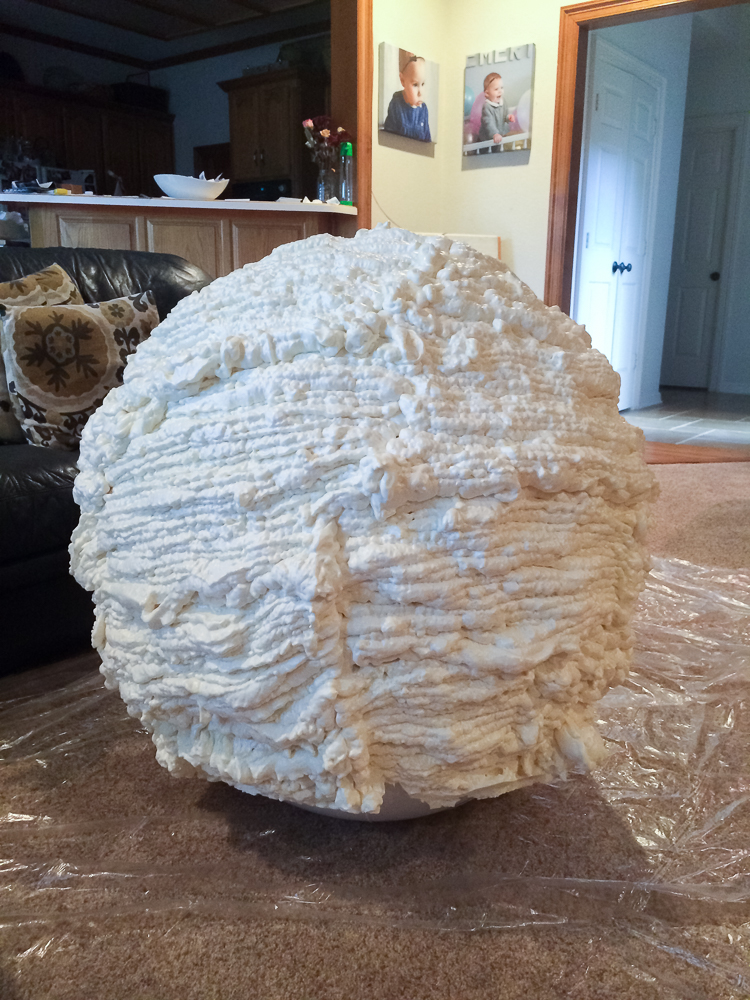
5. The next step was to carve and sand! This is an optional step really, it just depends how smooth you want the final result to be. The foam definitely dries very lumpy and bumpy, but if you don’t mind that, then you can slip this step completely. I wanted my costume to be as round and smooth as possible though, so we took it inside and used an exacto knife to cut off the areas that were protruding out. (You can see what I mean in the picture below: some areas were put on thicker so they expanded more. We used a knife to trim these down.) After carving it, we took it back outside and used our sander to try to smooth it out. This worked fairly well, but it wasn’t perfect by any means. I definitely think it helped in the end though!
6. The next step was to figure out how to turn this guy lime green. I actually bought a few cans of lime green spray paint that I ended up returning because Grant had an even better idea: just cover it with a tshirt! I took the measurements of the ball and then used those measurements to look online and compare it to a men’s sizing chart. Turns out my costume was about the size of a men’s 6XL, so I got to work looking for a tshirt that would fit! This is where I just love Amazon. In a matter of minutes I found this result on Amazon and ordered two t-shirts in lime green (at the time they were each less than $10). I’m glad that I ordered two because even with all the stretching we did, one tshirt was too short. It fit over the bulk of my costume just fine, but I would have had to cut it much higher in order for the green tshirt to cover it completely on the bottom. It was important to me that the costume be as big as possible, so we just put one tshirt on from the bottom up, and one on from the top down. They overlapped at the bottom (which you can see in the final picture) but I think it looked fine! And I was happier with that than the alternative of having a shorter costume.
7. After fitting the tshrt on, we unplugged the beach ball and deflated it, pulling it out from the bottom. We were worried about this step but the beach ball detached itself really easily and no damage was done! Plus now we have an 8-foot beach ball to play with in the pool next summer :) We then used the tshirt head and arm holes as a guide and cut into the foam with an exacto knife in order to give me room for my head and arms. We didn’t have to cut anything off the bottom, since we planned that out ahead of time and when foaming, we left space on purpose at the bottom so I could slip the costume over me.
(You can see in the picture above how the costume looked after the ball was taken out and the tshirt went on. I was deciding whether I wanted to tuck the sleeve into the hole (left) or leave it out (right). I decided to leave it out, that way it would cover my arms too.)
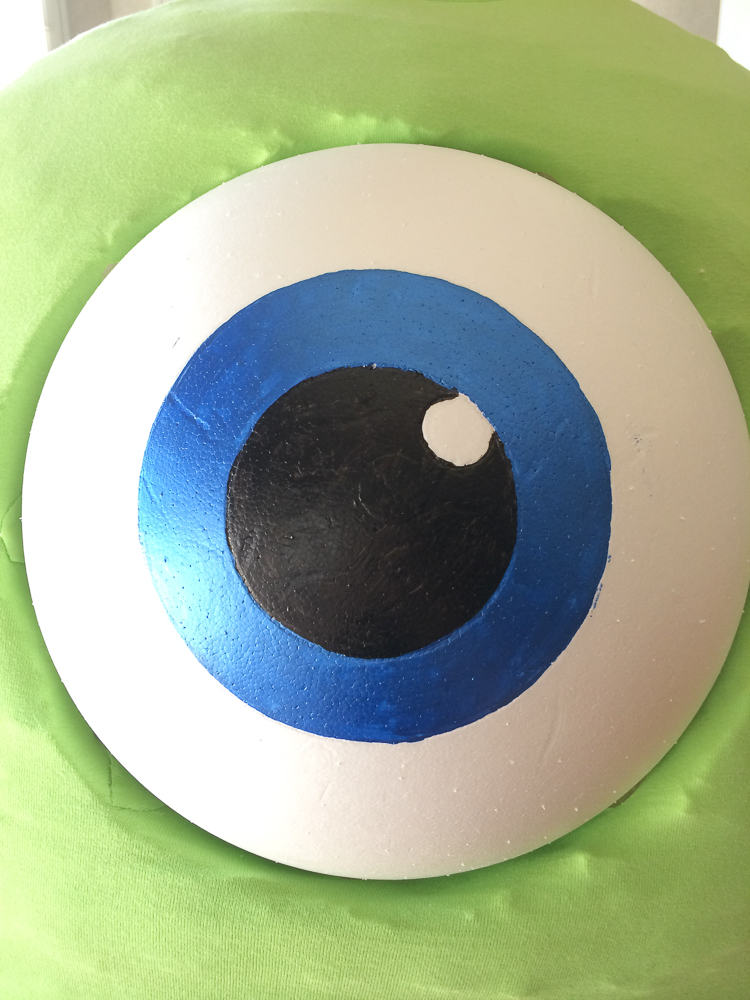
8. Now the next step was making the eye! I went to JoAnns and found this styrofoam half-ball that I thought would work perfectly. I simply used black and blue paint that I had on hand to paint in the eye and then let it dry.
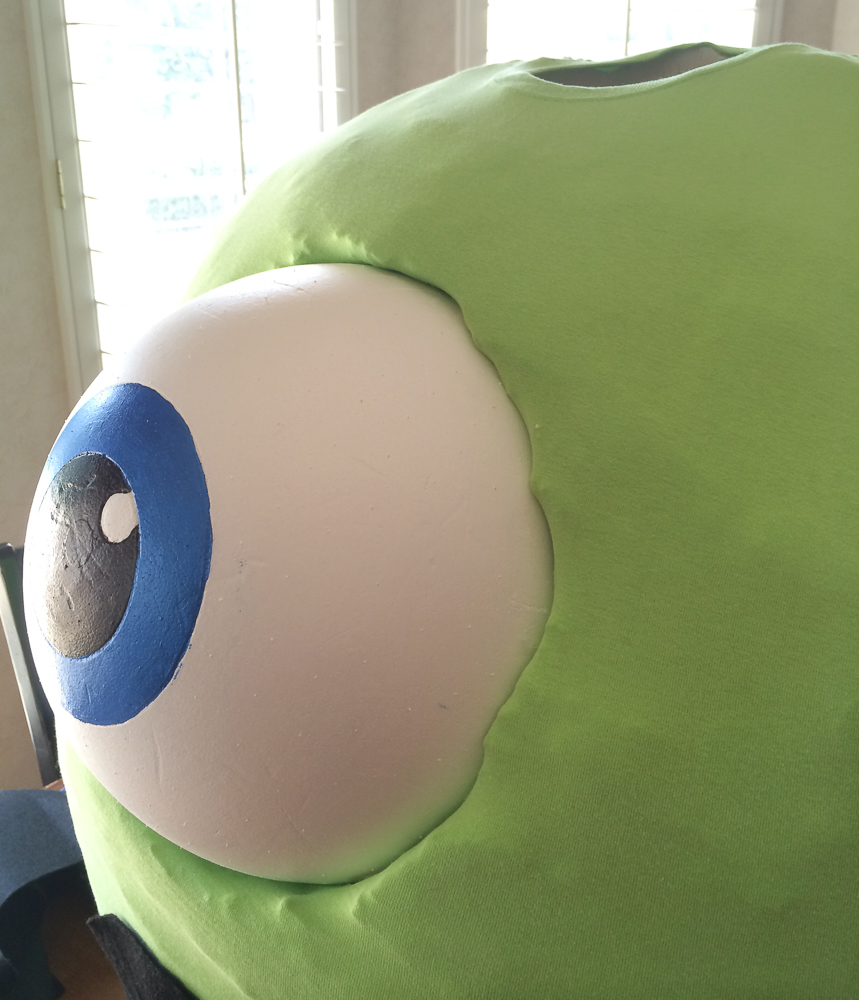
9. Next was fitting it into the costume. This was a little trickier since we had to cut the hole for the eye on the inside of the costume. So we worked together and kind of guessed where we wanted the eye positioned, and then Grant cut out a slightly smaller circle from the costume, so we could stuff the eye in and it would hold by being wedged in, instead of glued. Before wedging the eye in completely though, I stretched the tshirt (which had been cut too) and pulled it from the outside in and hot glued it around the cut-out hole. This way I wouldn’t have the original foam showing through. I hope that makes sense! It was very simple to do and once it was all dry, we were able to stuff the eyeball in from the inside out. It looked great!
10. Now for the mouth! This was also an easy step. I grabbed black and white felt that I had on hand, cut out the shapes I wanted to use for the mouth and teeth, and then sewed them together.
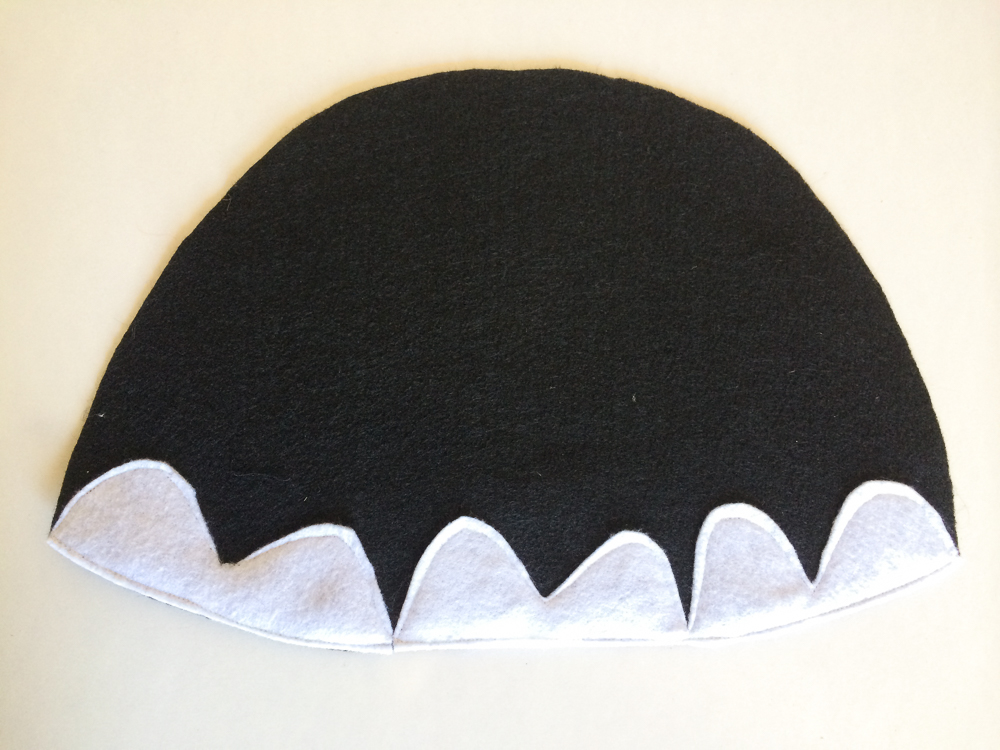
11. Once I had the mouth completed, all I had to do was sew it onto the costume. Instead of taking the tshirt off and sewing it with my machine (this wasn’t an option since I had already cut the hole for the eye and we had secured that to the costume), I just lifted the bottom of the tshirt up a little bit and hand sewed the mouth on. It really didn’t take long and since the mouth is so light-weight, I wasn’t worried about securing it on too well. Just a few stitches around the whole mouth did the trick!
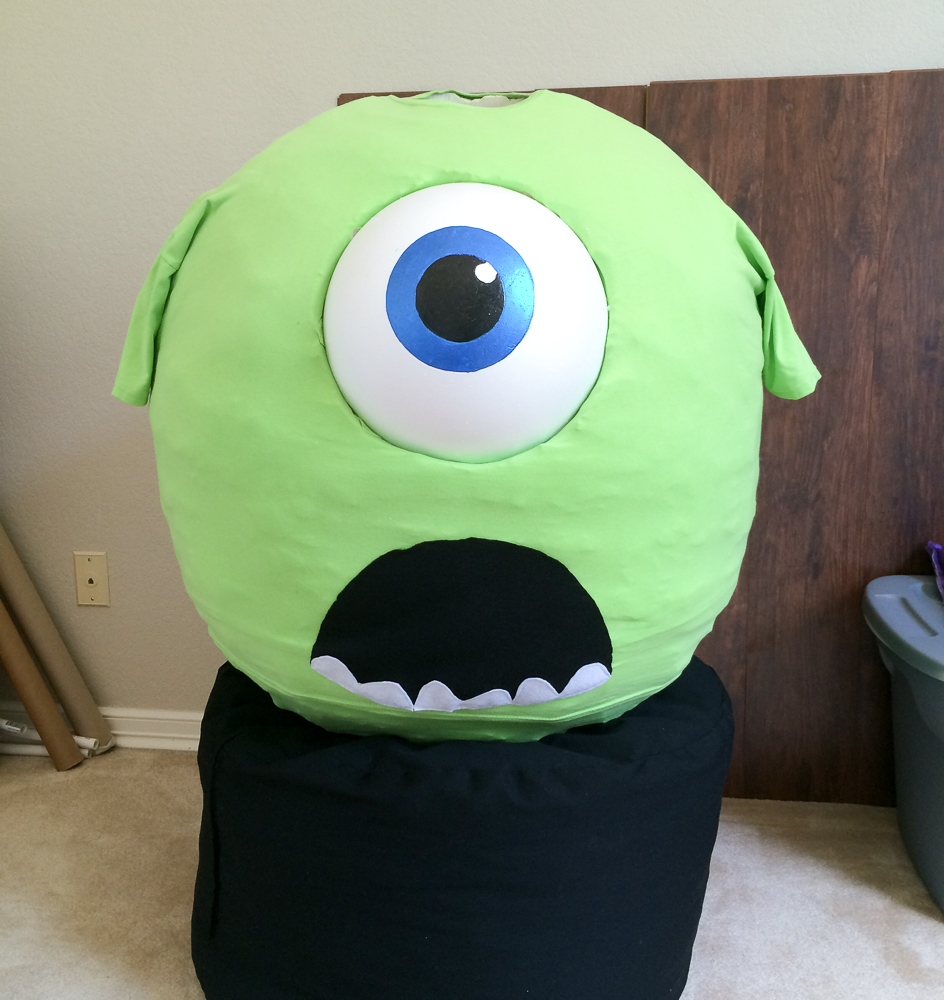
12. The last step to finish the body of the costume was to make the horns. This too was very easy as all I did was buy two of these styrofoam cones from JoAnns and then hot glued them on to the shoulder of the tshirt!
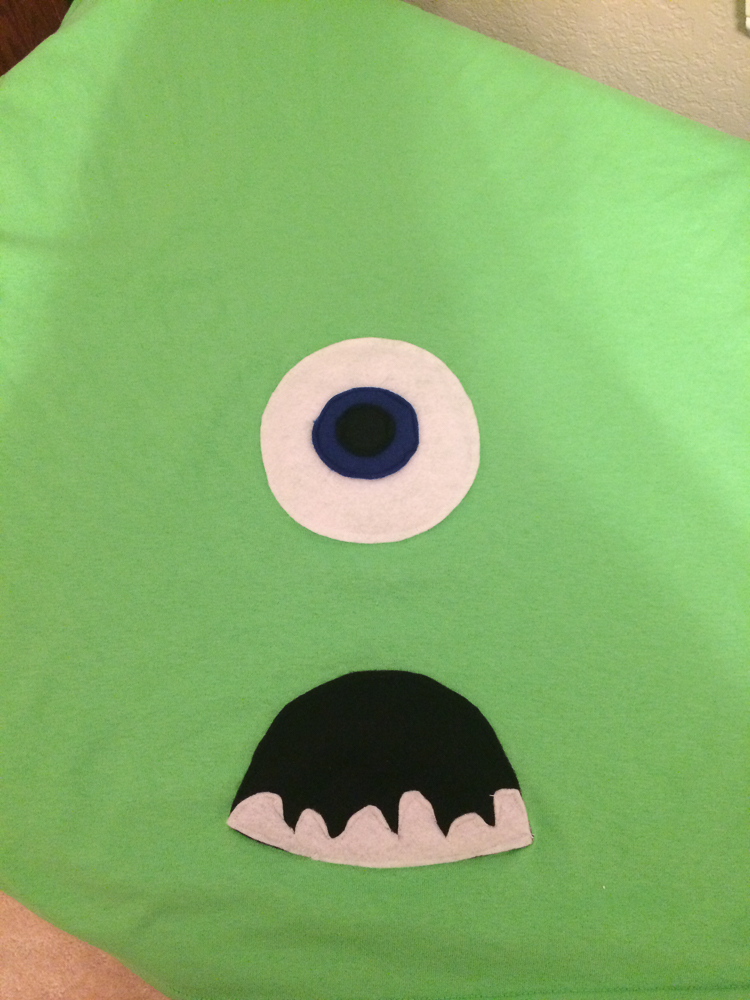
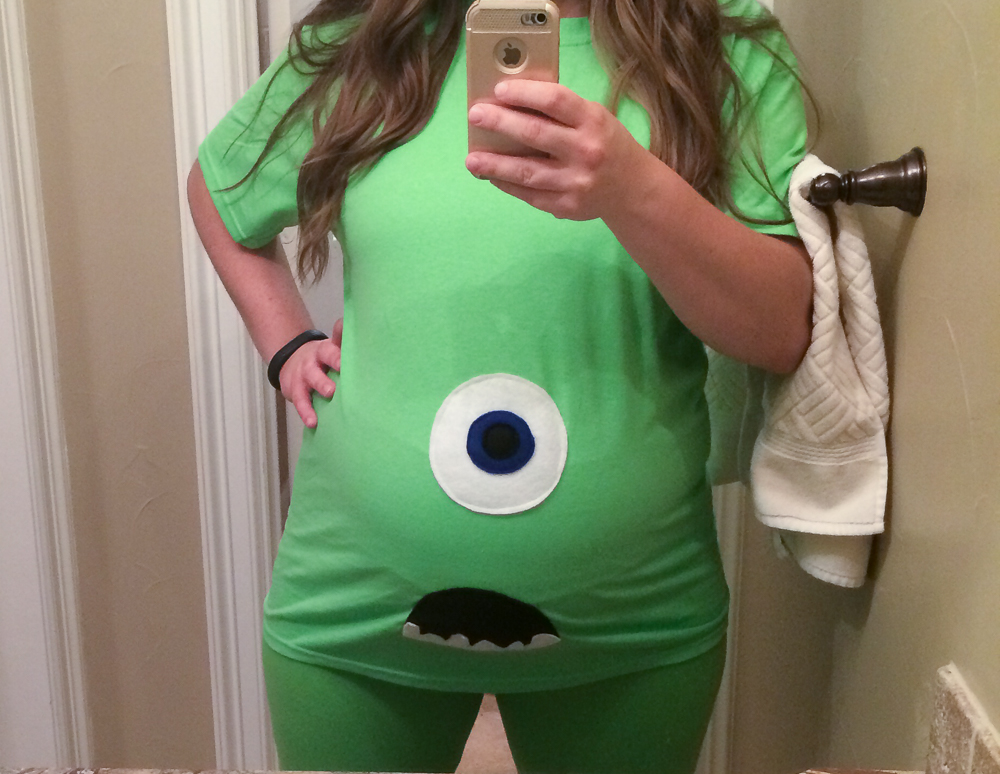
13. And finally, the last step to complete my costume was to find green pants and a tshirt to wear underneath. I was worried about finding lime green pants, but after looking through Amazon I just googled it and found these. They worked perfectly! The tshirt was also easy to find—I could have bought one off Amazon, at Walmart, Target, etc. But I happened to be at Hobby Lobby one day and grabbed a lime green shirt they had. I then returned to my stash of felt and cut out shapes for an eye and a mouth to match my giant costume. I knew I wanted to make a mini version for the tshirt I’d be wearing underneath. That way, even when I had to take my costume off (like to eat), I would still be Mike Wazowski with my pregnant belly! I sewed the shapes together and then sewed them onto the shirt. Very easy! And so comfortable too—I was basically just wearing pajamas all night :)
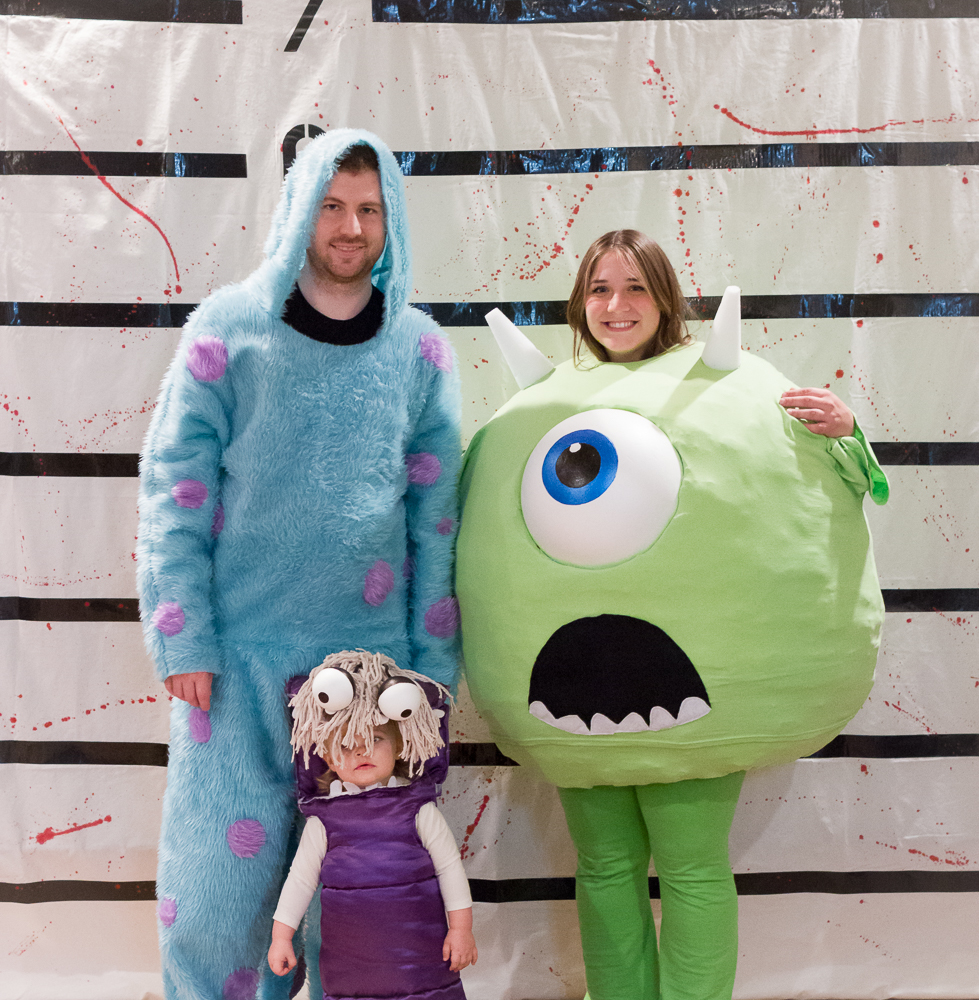
So there you have it! It might look complicated, but each step was fairly simple. It just took a lot of time! I knew it was going to, though, which is why I got started in August! Grant thought I was crazy, but it was nice not having to worry about finishing costumes right before the party. Starting early also ensured we were able to wait on certain things to come in, like the tshirts from Amazon, and figure out the best way to complete each step. Plus I was able to take my time on it, instead of having to work on it all at once. I’m really happy with how it turned out—I think we all looked great together!
Next I’ll do a tutorial post for Emery’s Boo costume! So look out for that, if you’re interested :)
]]>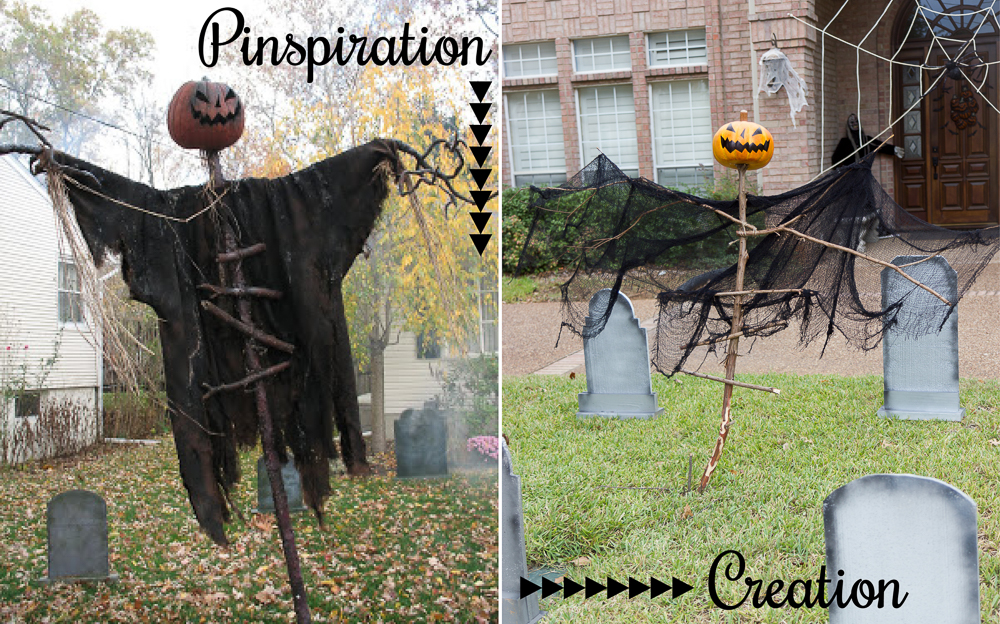
The image on the left is the one I found on pinterest and served as my inspiration for this project. The best part was how cheap it ended up being! For the materials, all I needed was sticks from the yard, black “creepy cloth” that I buy each year from the dollar store (I used 3 packs here), and a fake pumpkin for the head. Last spring I picked up a bunch of Fall decorations from my local tag sale, including the pumpkin I ended up using. (It was much kinder looking before I drew on the creepy face with sharpie.) So in total I believe it cost me $3 for the “creepy cloth” and about $2 for the pumpkin head. Not bad! Especially when the end result really made such a statement in our front yard.
1. First, we started by finding sticks in our back yard that would work. I went off the picture from pinterest and found one big long stick that was pretty solid, two medium-sized sticks for each of the arms, and then smaller sticks to fill in the middle.
2. Next we got out the nail gun and went to work positioning the sticks and nailing them together. The nail gun definitely saved us some time! But even if we hadn’t been able to use one, I think twine would have worked just fine too.
3. I then drew the face on the pumpkin head and stuffed it on top of the stick. Luckily my pumpkin was made out of foam, which made it very easy to poke a hole in and screw the head on.
4. The next step was to drape the “creepy cloth” over the sticks to give the appearance of the scarecrow’s clothes.
5. And finally, we set it up! Grant took care of this part. He dug a small hole in the ground and then we wedged the scarecrow in. I was nervous about it tipping over, but since he is so light, we didn’t have a problem! After posing him amidst our tombstones, we were done! And I seriously love how it looked!!
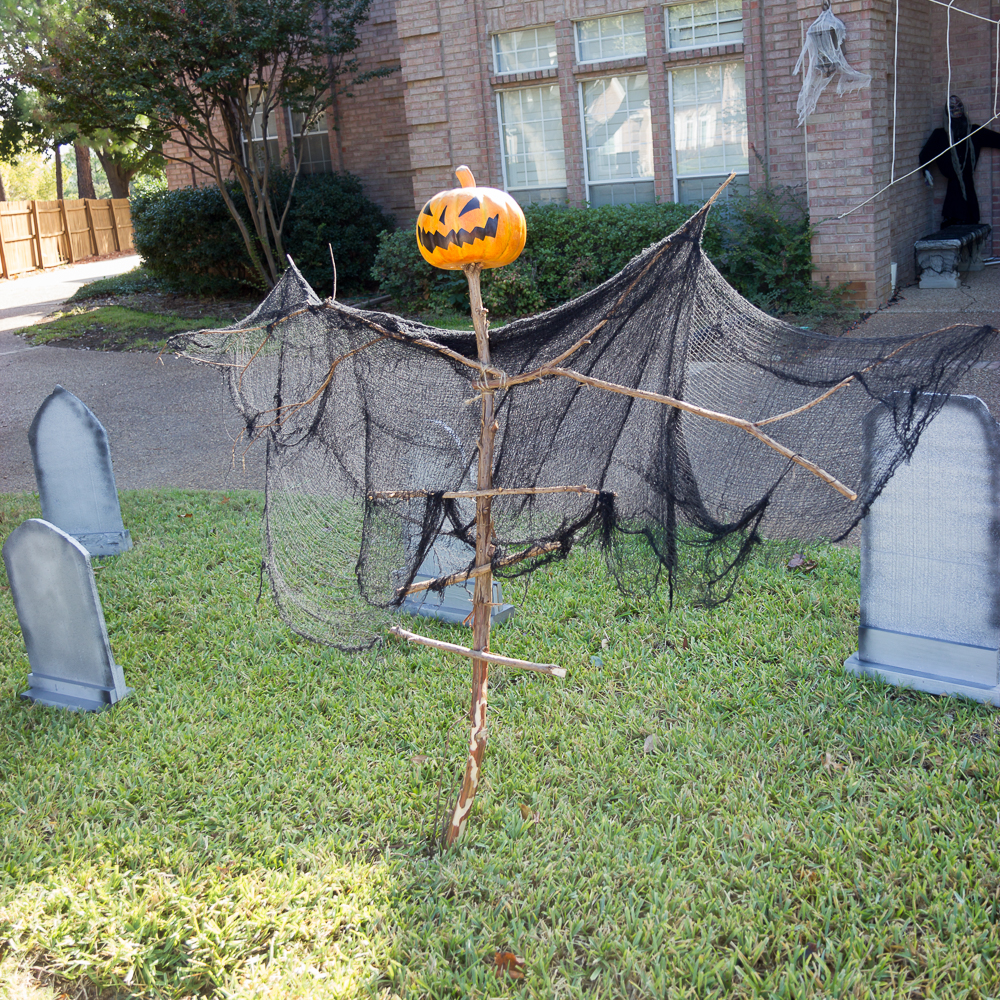
And in case you missed it, you can check out my post on our Halloween Tombstones for a full tutorial!
]]>


Then this afternoon we went over to Grapevine Mills to mainly walk around, with the added bonus of shopping. We spent a few hours there (which definitely resulted in lots of contractions and cramps..but no baby yet) and ended up getting a few things we all needed: pajamas for Emery, tshirts for Grant, clothes for the new baby, and even some flower crowns for me to use in upcoming photo shoots! Now all we need is this baby to come!!
]]>First up are our Halloween Tombstones. I have been wanting to turn our front yard into a little graveyard for the past several years but have always run out of time. So this year I made it a priority and got the materials together and got started very early! Grant thought I was crazy to be working on decorations before it was even September, but I wanted to be prepared! So if you’re interested in a quick tutorial, read on!

1. First of all, I was working off this picture that I found on pinterest:

and figured that looked simple enough to follow. So I headed to Lowe’s where I picked up some foam boards (like these) and then checked to make sure I had enough grey paint and black spray paint on hand. I also needed a way to secure the foam down and liked how this picture has the foam anchored to wood, so I checked our wood scraps pile and made sure we had enough to cut down and use. So if you’re wanting a full material list, you’ll need:
- Foam boards (mine came in a pack of 6 I believe of .5″ x 2′ x 4′)
- Grey spray paint
- Black spray paint
- Wood
Around Halloween I always have cans of black and white spray paint on hand, so I got pretty lucky for this project, as I really didn’t need to buy much. We had leftover grey paint from when we painted Monster’s nursery and even some grey spray paint from Halloween a few years ago. Then as I mentioned earlier, we always have tons of wood scraps in our garage that I find use out of. So in total I believe this project cost me about $12! And I got 12 tombstones in the end.
2. Next I started by drawing out the shapes of the tombstones on the foam and then cutting them out (well Grant did the cutting, as I’ve been known to injure myself while doing projects and he was nervous about what I’d do with an exacto knife). This step was really simple though! Since each board was about 4′ long, I measured the half way point and then cut some exactly at 2′ and others a little shorter and a little longer to get different heights. This way I ended up with 2 tombstones per board, giving me 12 in total. I free handed most of the shapes for the tops of the tombstones, but used a giant mixing bowl as a pattern in order to do the rounded ones. I drew on the lines and then Grant cut them out—very simple!
3. The next step was to cut out the wood, which I also needed Grant’s help for. We decided we didn’t want it to be perfect because we wanted the tombstones to have an aged look to them, which actually made the process easier. This meant sanding wasn’t necessary and even exact measuring wasn’t that big of a deal. We just grabbed all the spare wood we had and then Grant used the saw to cut out different lengths that would cover the foam. We wanted two for the sides and one as the base, so each tombstone had three pieces of wood attached to it.
4. After cutting out the wood, we grabbed the nail gun and went to work nailing the foam to the wood! This too didn’t need to be exact, because it would only enhance the aged and forgotten look we were going for. So we simply grabbed wood that matched in lengths, starting with the two side pieces, and nailed them to the foam. Then we turned the entire thing on it’s side and nailed a base on to it, in order to help the tombstone stand up on it’s own. Here’s where I finally remembered to take a picture. (Sorry for the messy garage and terrible lighting.)


You can see in the photos above that I kept the shapes pretty simple, which made them easier to cut out. And the wood really was just scraps of whatever we had lying around! Anyone can do this project—it really doesn’t take much!
5. Okay so the next step was to paint. This actually would have gone VERY quickly if I had used all spray paint, because spraying the few tombstones that I did (until my spray paint ran out) took no time at all. The best part is you don’t need it to go on even, and you don’t need to cover it 100% because the imperfectness of it all adds to the final look! The painting took me a little longer because I ran out of spray paint and then had to use the two different greys we had leftover from painting Monster’s nursery. It definitely still worked, but painting it on with a brush just took longer. Although I have to say I like the result of having three different colors of grey. I think it helped make the final product look more authentic and less uniform.


6. After letting the grey paint dry, I came back and went over the edges with black spray paint in order to give it that aged appearance. I was a little heavy-handed on the first few I tried, but learned quickly enough and I think they turned out pretty great! At this point you can choose to paint on/write on names/messages if that’s what you want. I actually tried with a few and hated the way it looked. I have no talent when it comes to hand lettering so after I added a few names I thought it made my tombstones look pretty cheesy. Luckily all I had to do was just go back over the spots with grey paint and I was all set!

Setting them up in our front lawn was also super easy because we didn’t need to anchor them into the ground at all, the wood bases did that for us. I love how they turned out and adding in the Halloween Scarecrow really added to the overall spooky vibe I was going for. I’ll make sure to include that as another tutorial post! So that’s it :) Pretty simple! And here’s the final result:

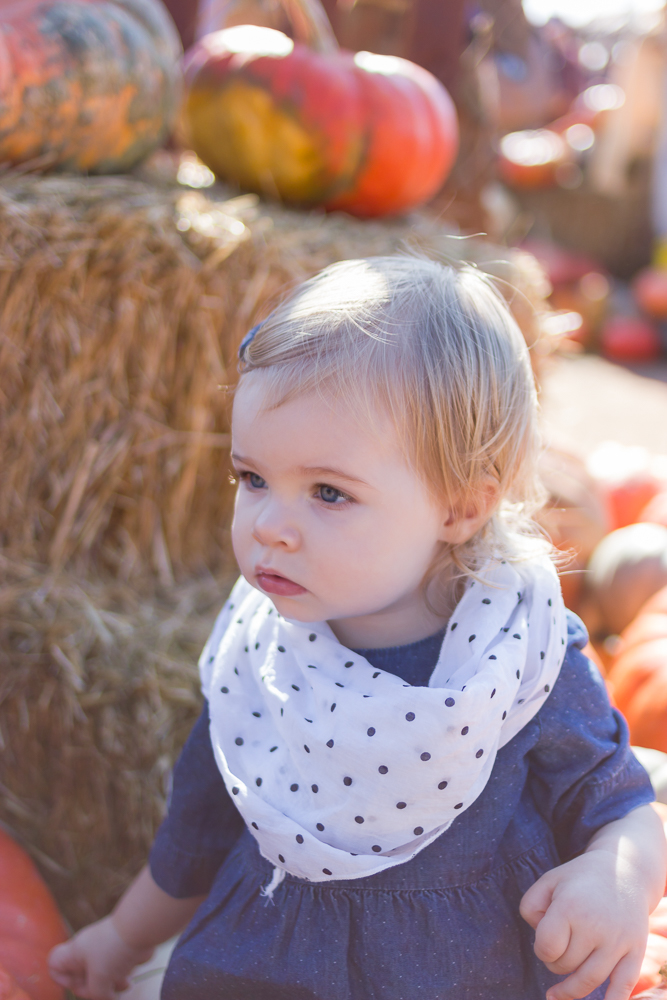
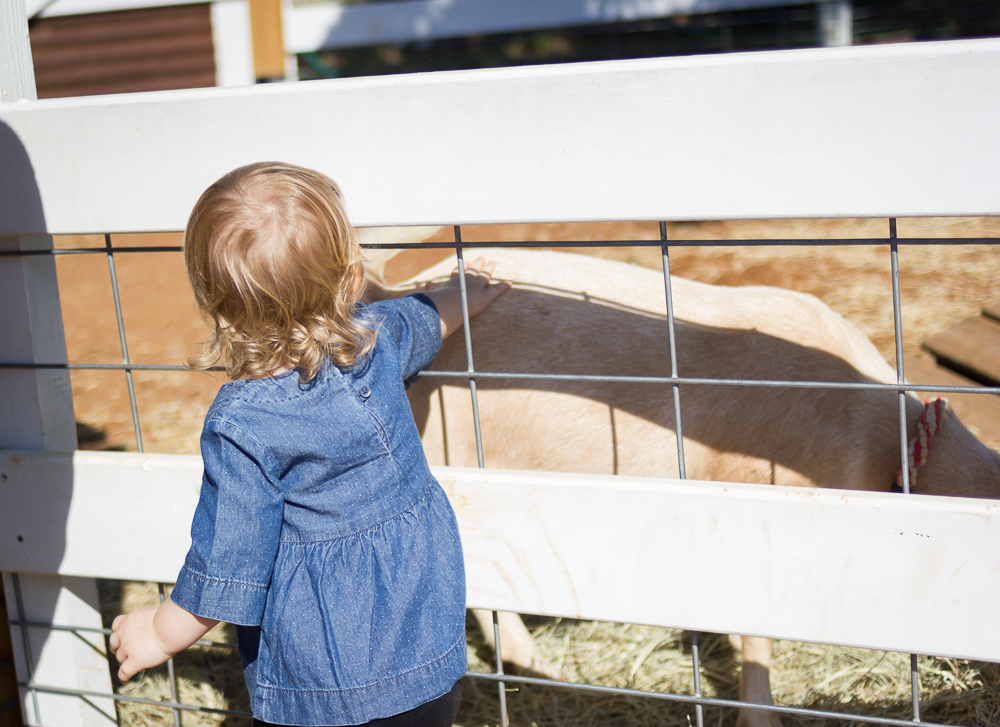
We were originally planning to go this Saturday but yesterday we were randomly talking about it and decided that this weekend would probably be very crowded, since it’s the last weekend to go, and Tuesdays are cheaper (by bringing a can of Dr. Pepper). Grant said he could leave work early so we decided to make it happen! We got to the fair about 5:00 and spent a few hours walking around the whole place, sampling fried foods, doing a lot of people watching, seeing Big Tex, and visiting the farm animals. Emery was a good sport and we had a great time!


So we have decided this baby is coming early! And by “we,” I mean me and Critter (that’s the baby). We’ve had a few talks and he’s been getting ready (read: contractions for weeks now), so it’s almost time. I can feel it! With that in mind, Grant and I decided the safest thing would be to throw our Halloween party early this year just in case we either have a newborn by Halloween, or Critter decides to make a very untimely appearance and we are in the hospital on Halloween. (But please pray for me that that won’t happen!) So all of this brings us to why I’m already posting about our Halloween Party and it’s only October 13th—because we already had it!
In this post, I shared how I invited all of our guests to our party and the response was great! We had just over 30 people RSVP that they were coming so I got to work! This year I added a bunch of new decorations and also changed up the food to try a few new things. Plus our costumes were really fun this year and I’m so happy with how they turned out! There’s a lot of pictures to share, so let’s start with the decorations first.
Decorations
When our guests first pulled up to the house, here is what they saw (you can click on any of the pictures to enlarge them):


These pictures were taken during the day so when our guests came it was actually much darker and we also had a fog machine going, which really helped give more of a spooky effect (plus the orange lights were turned on). It all looked great! Then once they came inside all the lights were off except for black lights in a few lamps and tons of candles lit. It was hard to get pictures of what our guests actually saw, so here’s some taken during the day and you can just use your imagination. I was really happy with how spooky everything looked.


I completely covered our living room in white sheets and then found these two creepy dolls on Craigslist and spray painted them white to add to the effect. Then I topped it off with a bunch of shredded cheesecloth and cob webs! Up the stairs I created a gallery wall of creepy pictures and on the dining room table I had about twenty candles burning to light our guests way:


Next our guests passed another creepy zombie as they made their way down the hall, which was illuminated by floating candles that I made.


You can kind of get the idea of what our guests saw in the first two pictures, but I then went back during the day and took more photos so you can really see the set up and how we cobwebbed all of the pictures on the walls. We also placed another fog machine down this hallway so when our guests walked through, they were blasted with even more fog!
Off to the side was one of the bathrooms I decorated as a murder scene. The lights were all off for the actual party and everything was illuminated by just candlelight:


Then when our guests continued down the hall, they reached the main area where I had decorated the room with a giant bat wall, floating witches’ hats, a bookcase full of creepy objects, a potion set in the corner, and a mantel full of ravens.


Then to separate the room from the kitchen (where I had all the refills for the food and other messes I didn’t want to show), I hung up black distressed curtains that I made out of garbage bags. It worked really well!


And the last room I decorated for the party was the second bathroom, which I also set up as a murder scene. When our guests walked in, it was all dark except for some candles burning on the counter and a few black lights glowing overhead. There was also a faint light coming from the shower (which was hidden by the shower curtain), and illuminating a terrifying figure of a man. It looked awesome!


So there you have it! I know that was A LOT of pictures, but it’s hard to accurately show everything without posting that many, so I hope you don’t mind :) Up next is the food!
Food & Drinks
For the past couple of years I’ve made many of the same dishes and this year I wanted to switch things up. So I decided to make tomato soup with mozzarella eyeballs as the main dish, pumpkin clementines and a pumpkin vomiting guacamole (to go with chips) as the sides, and then brownie rats, oreo eyeballs, dead man’s finger cookies, poison caramel apples, and graveyard pudding cups as the desserts. Everything tasted really great and after our guests realized what everything was, they went to town! The soup is the only thing I didn’t get a great picture of—it’s in the cauldron right in the middle of the table, but from the angle I took the photo you can’t see the soup. But trust me, it looked and tasted great!


And for the drinks, I just wanted to keep it simple so I grabbed a bunch of sodas and then slapped on some fun labels.

We all had a good time eating and chatting for a while before it was time to turn the lights off and play a game of Werewolf. But before that happened, I took pictures of all the couples in front of the photobooth I made! I was really impressed with everyone’s costumes—I love how into it all our friends get too!
Costumes
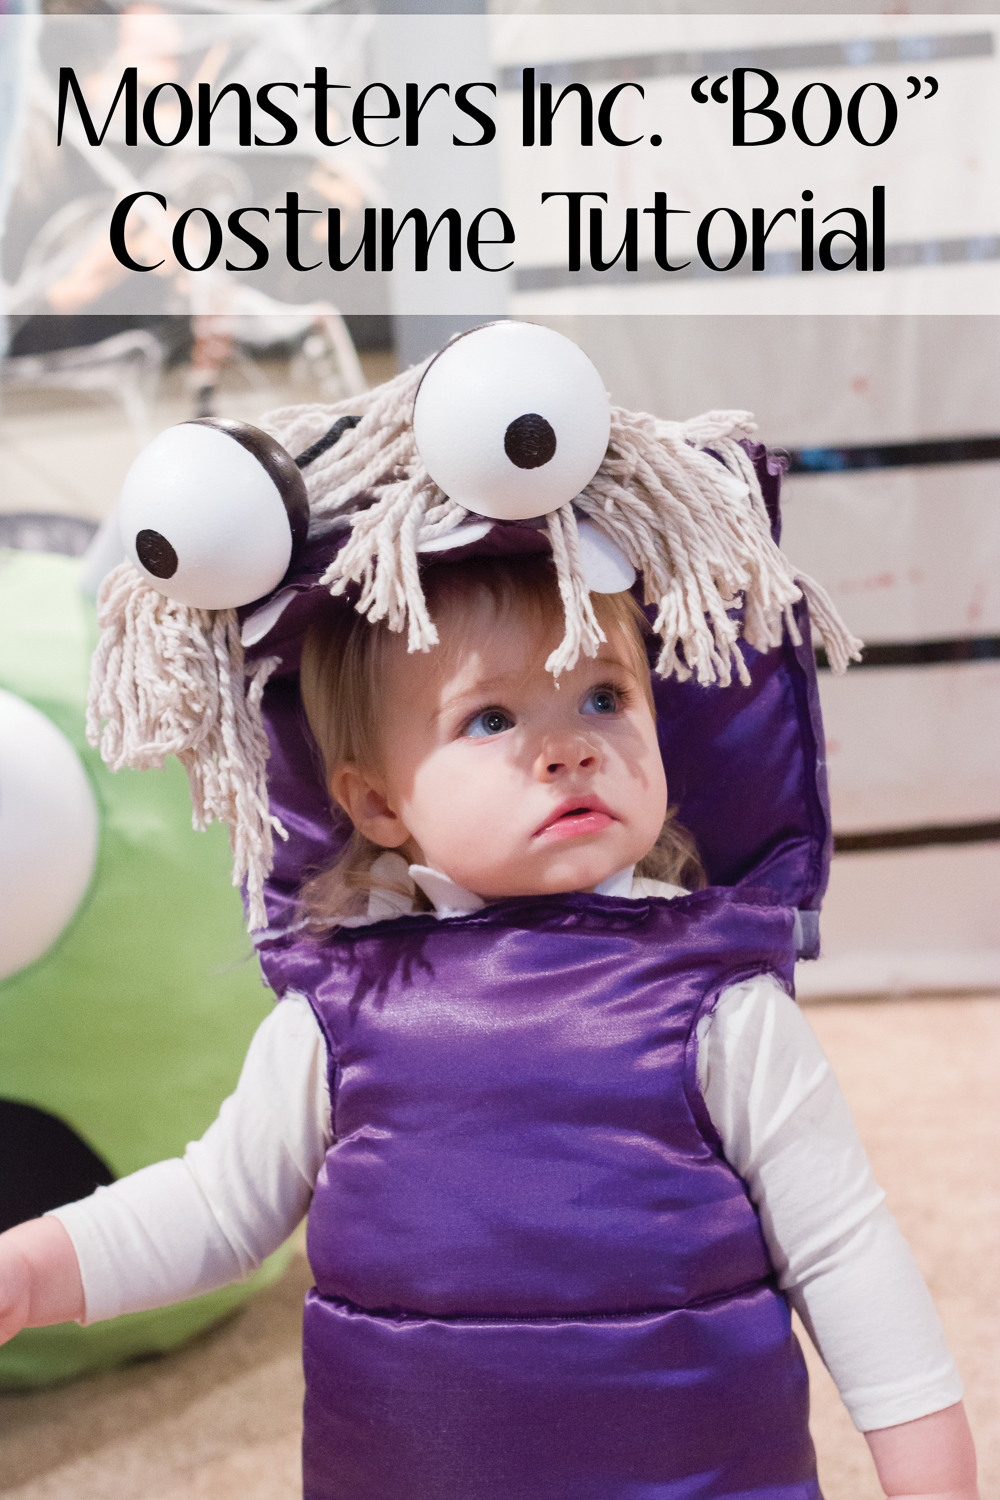
Ever since Emery became “Monster” I’ve wanted to dress her up as Boo from Monsters Inc. and have Grant and I go as Mike Wazowski and Sully. Last year was going to be the year until my mom suggested we wait until Emery is walking so that she could be teetering around and I had to admit that would be worth the wait. So we postponed it for another year and I’m glad we did! Emery walking around in her costume was WAY better than if we had done it last year and she would have just been held. Plus, I think I needed the extra year to come up with how to actually construct my costume and get over the fear of my sewing machine in order to make Grant’s. With A TON of help from my mom and Grant, I finished the costumes in time and I’m so happy with the result! (Everyone else looked pretty great too!)


Okay, and a couple more of Emery in her costume because she was SO cute in it:

That’s it! Long post with way too many pictures, I know. If you made it this far: thanks for staying with me! We had a really great party this year with an awesome turn out, delicious food, and a lot of fun chatting and playing games. I owe a huge thanks to my mom who flew into town specifically to help me with Emery and prepare for the party! And of course to Grant too who puts up with my craziness!
]]>